Follow Me On Social Media!


Looking for a fun twist on the classic grilled cheese sandwich? Look no further than this Grilled Cheese Roll-Ups Idea! These delightful cheesy bites are not only a delicious snack or quick dinner option but also a hit with kids and adults alike.
I recall the first time I whipped up these Grilled Cheese Roll-Ups for a group of hungry children after a sports practice – they were devoured in no time, proving to be a real crowd-pleaser. The gooey melted cheese encased in crispy bread is simply irresistible, making these roll-ups a go-to for impromptu gatherings or cozy nights in.
Whether you choose to add a touch of deli ham for a savory kick or customize with your favorite fillings like roasted red peppers or baby spinach, these Grilled Cheese Roll-Ups are endlessly versatile. Serve them alongside a bowl of tomato soup or zesty dipping sauces for a satisfying meal or as a fun party appetizer. Try out different variations and watch these roll-ups become a staple in your recipe collection!
Quick Benefits
- Quick and easy snack or weeknight dinner idea
- Customizable with different fillings like ham, turkey, or veggies
- Freezer-friendly for convenient make-ahead meals
- Perfect for family movie nights, parties, or as a fun appetizer
Why You’ll Love This Cheesy Grilled Cheese Roll-Ups Recipe Recipe
- Quick and Easy: Perfect for a snack attack or a simple weeknight dinner, these grilled cheese roll-ups are effortless to whip up, making them ideal for busy days.
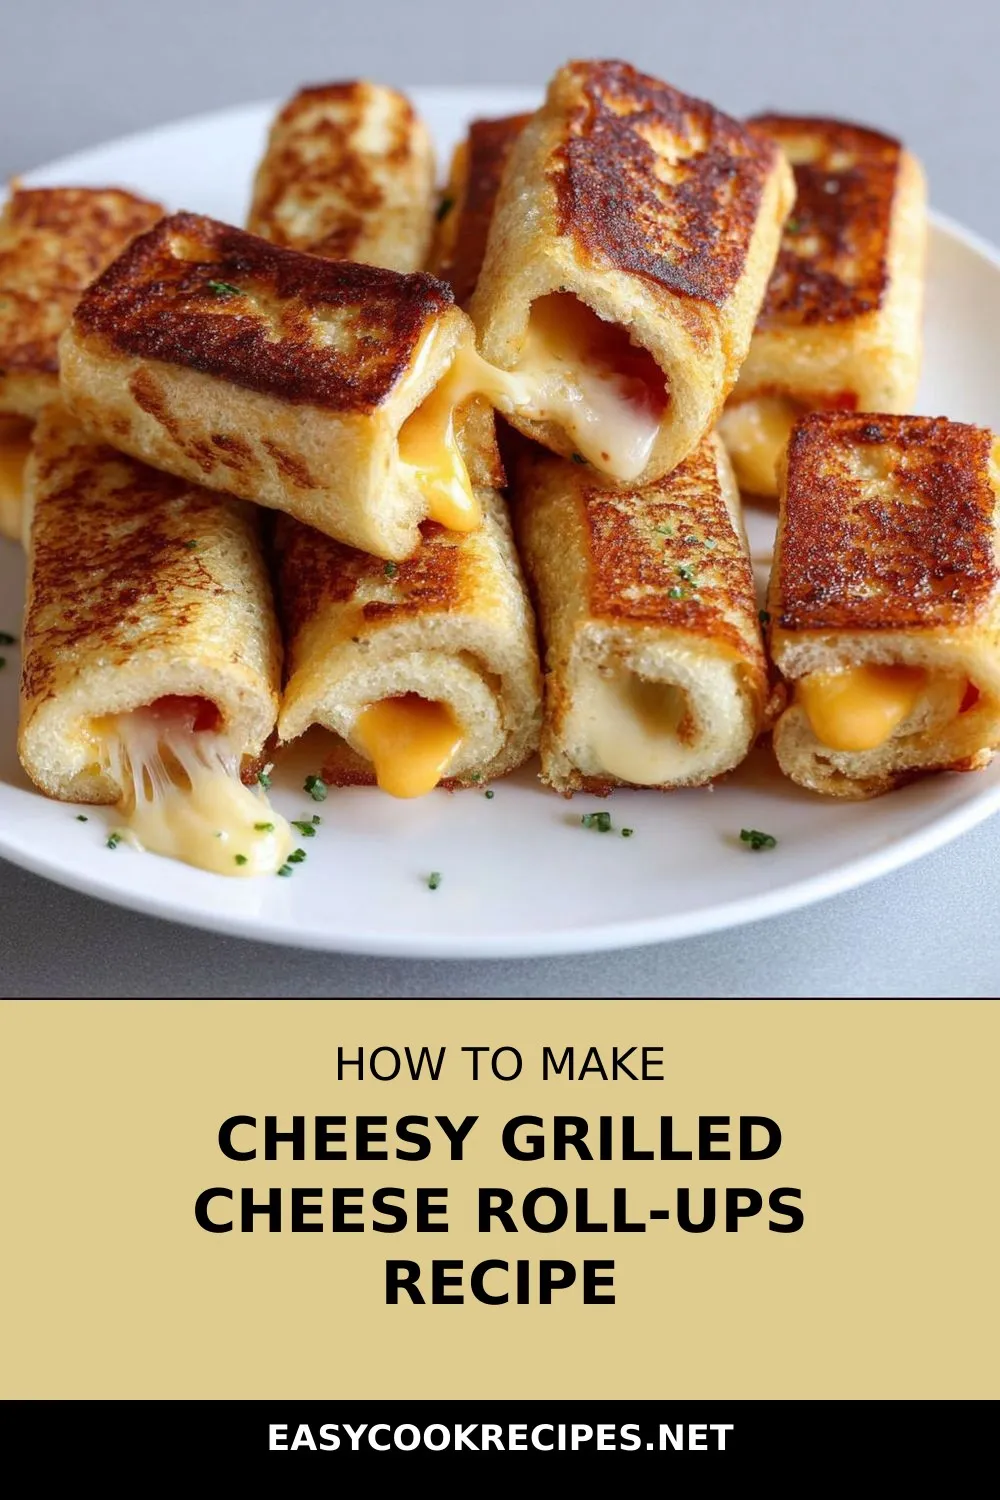
- Cheesy and Buttery: With a generous amount of cheddar cheese and a buttery exterior, these roll-ups offer a gooey, melty texture that is sure to satisfy any cheese lover.
- Versatile Options: Whether you prefer ham for a savory touch or want to explore vegetarian alternatives like roasted red peppers or baby spinach, this recipe offers flexibility to suit various tastes.
- Great for Entertaining: Serve these roll-ups as a fun party appetizer or snack for movie nights. They can be customized with different fillings and pair well with dipping sauces, making them a crowd-pleaser.
- Kid-Friendly: Kids will love helping to roll up the bread and watching the cheese melt. This recipe is a great way to involve little ones in the kitchen and create special moments.
- Make-Ahead and Freezer-Friendly: Prepare these roll-ups ahead of time and store them in the fridge for up to two days. You can also freeze them unbaked for a convenient snack option.
Ingredients for Cheesy Grilled Cheese Roll-Ups Recipe
Main Ingredients
- 6 thin slices deli ham (optional)
- 1 cup finely shredded cheddar cheese
- 6 slices white sandwich bread
- 2 tablespoons unsalted butter, softened
Pro Tips for Cheesy Grilled Cheese Roll-Ups Recipe
For the perfect Grilled Cheese Roll-Ups, make sure to roll them tightly and secure with toothpicks before grilling. This will help keep the cheese and filling intact during cooking. Remember to remove the toothpicks before serving to avoid any accidents.
Buttering the pan generously and cooking over medium-low heat is key to achieving that crispy golden brown exterior on your roll-ups. Be patient and ensure they are cooked evenly on all sides for the best texture and flavor. For extra crunch, assemble the roll-ups ahead of time and refrigerate until you’re ready to grill.
Get creative with your fillings to suit different tastes and occasions. Swap out the ham for turkey, pepperoni, or even roasted veggies for a variety of flavors. Serve your Grilled Cheese Roll-Ups with tomato soup, a side salad, or a choice of dipping sauces to elevate the dish and add extra layers of deliciousness to your meal.
How to Make Cheesy Grilled Cheese Roll-Ups Recipe
Step 1: Prepare Bread
Trim the crusts off each bread slice and flatten them evenly with a rolling pin.
Step 2: Assemble Roll-Ups
Evenly sprinkle shredded cheese over each flattened bread slice. Add a thin slice of deli ham on top, if desired.
Step 3: Roll and Secure
Roll up each bread slice tightly and secure the ends with toothpicks if needed.
Step 4: Preheat and Butter
Preheat a skillet over medium to medium-low heat. Add butter and allow it to melt, swirling to coat the pan.
Step 5: Cook Roll-Ups
Place the roll-ups seam side down in the skillet and cook for 5 to 8 minutes, turning with tongs until golden and cheese is melted on all sides.
Step 6: Serve
Place the roll-ups on a plate, remove toothpicks, and optionally cut in half. Serve promptly.
📌 Pin for later!
Storage Tips
After preparing the Grilled Cheese Roll-Ups, store any leftovers in an airtight container in the refrigerator for up to two days. To reheat, use a toaster oven or skillet for maximum crispness rather than the microwave, which can make the bread soft. Simply place the roll-ups in the toaster oven or skillet until heated through and enjoy them warm.
For longer storage, you can freeze unbaked assembled roll-ups on a tray and then transfer them to a freezer bag. When ready to cook, bake or cook the roll-ups from frozen, adding a couple of extra minutes to the cooking time in the skillet. Remember to let them cool before freezing to prevent sogginess. This way, you can enjoy these cheesy delights even on busy days by simply reheating them straight from the freezer for a convenient and delicious meal or snack.
Ingredient Substitutions
For a lighter option, you can swap the ham for turkey or leave it out altogether for a vegetarian version. To add a pizza twist, try using pepperoni as a filling. For a vegetarian option, consider adding roasted red peppers or baby spinach instead of meat. If you need to make this recipe gluten-free, simply use gluten-free bread as a substitute for white sandwich bread.
Feel free to experiment with different types of cheese such as mozzarella or American cheese if cheddar is not your favorite. You can also add a sprinkle of fresh herbs like basil or parsley to the cheese for a springtime twist. For a flavorful touch, try adding thin tomato slices before rolling in the summer or dusting with smoked paprika or garlic powder in the fall or winter. Get creative with your fillings to customize these grilled cheese roll-ups to your liking.
Serving Suggestions
For a creative serving suggestion, try cutting the grilled cheese roll-ups into bite-sized pieces and serving them on skewers for a fun and interactive appetizer at your next party. This way, guests can easily grab a skewer and dip the cheesy bites into their favorite sauce for a delicious and convenient snack.
Another idea is to create a build-your-own grilled cheese roll-up bar. Set out an assortment of fillings such as different cheeses, meats, veggies, and herbs, along with various dipping sauces. Let your guests mix and match their ingredients to create their own customized roll-ups, making it a memorable and interactive experience for everyone involved.
FAQs for Cheesy Grilled Cheese Roll-Ups Recipe
Can I freeze the Grilled Cheese Roll-Ups before cooking them?
Yes, you can freeze unbaked assembled roll-ups on a tray and then transfer them to a freezer bag. When ready to cook, bake or cook them from frozen, adding a few extra minutes of cooking time in the skillet. Remember to let them cool before freezing to prevent sogginess.
What is the best way to reheat leftover Grilled Cheese Roll-Ups?
To reheat leftover roll-ups, it’s best to use a toaster oven or skillet for maximum crispness. Avoid the microwave as it can make the bread soft. Simply heat them until they are warmed through and enjoy!
Can I make these Grilled Cheese Roll-Ups vegetarian?
Absolutely! You can skip the ham to make a vegetarian version of these roll-ups. For added flavor, consider adding ingredients like roasted red peppers, baby spinach, or other veggies of your choice to create a tasty vegetarian option.
How do I prevent the Grilled Cheese Roll-Ups from unraveling while cooking?
To prevent the roll-ups from unraveling while cooking, make sure to roll them tightly. You can also use toothpicks to secure them before grilling. Just remember to remove the toothpicks before serving to avoid any accidents.
Conclusion
As you embark on making these delightful Grilled Cheese Roll-Ups Idea, remember that the joy of cooking lies not just in the delicious end result, but in the memories you create along the way. Whether it’s a casual weeknight dinner or a special gathering with loved ones, these roll-ups have a magical way of bringing smiles to the table.
Don’t be afraid to get creative with your fillings and seasonings to tailor these roll-ups to your taste. The versatility of this recipe allows you to experiment with different ingredients and flavors, making each batch a unique culinary adventure. So go ahead, roll up your sleeves, and let the comforting aroma of grilled cheese fill your kitchen with warmth and happiness. Cheers to many more moments of culinary delight with these Grilled Cheese Roll-Ups Idea!
📌 Pin for later!
Cheesy Grilled Cheese Roll-Ups Recipe
Cheesy grilled cheese roll-ups, a fun twist on a classic sandwich, perfect for snacking, movie nights, or quick meals—sure to be a hit!
Prep Time10 min
Cook Time8 min
Total Time18 min
CuisineAmerican
Skill LevelEasy
Servings6 Servings (6 roll-ups)
Ingredients
Main Ingredients
- 6 thin slices deli ham (optional)
- 1 cup finely shredded cheddar cheese
- 6 slices white sandwich bread
- 2 tablespoons unsalted butter, softened
Instructions
-
Prepare Bread: Trim the crusts off each bread slice and flatten them evenly with a rolling pin.
-
Assemble Roll-Ups: Evenly sprinkle shredded cheese over each flattened bread slice. Add a thin slice of deli ham on top, if desired.
-
Roll and Secure: Roll up each bread slice tightly and secure the ends with toothpicks if needed.
-
Preheat and Butter: Preheat a skillet over medium to medium-low heat. Add butter and allow it to melt, swirling to coat the pan.
-
Cook Roll-Ups: Place the roll-ups seam side down in the skillet and cook for 5 to 8 minutes, turning with tongs until golden and cheese is melted on all sides.
-
Serve: Place the roll-ups on a plate, remove toothpicks, and optionally cut in half. Serve promptly.