Follow Me On Social Media!

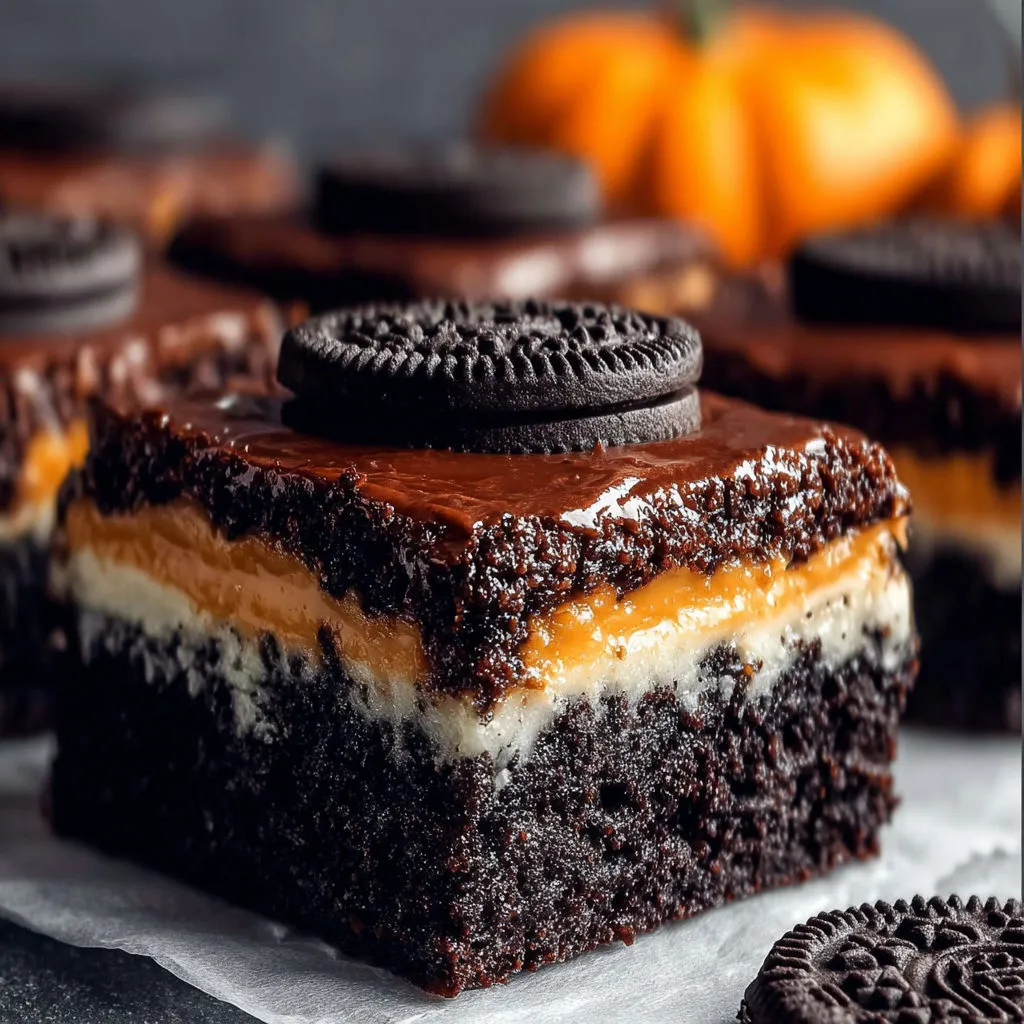
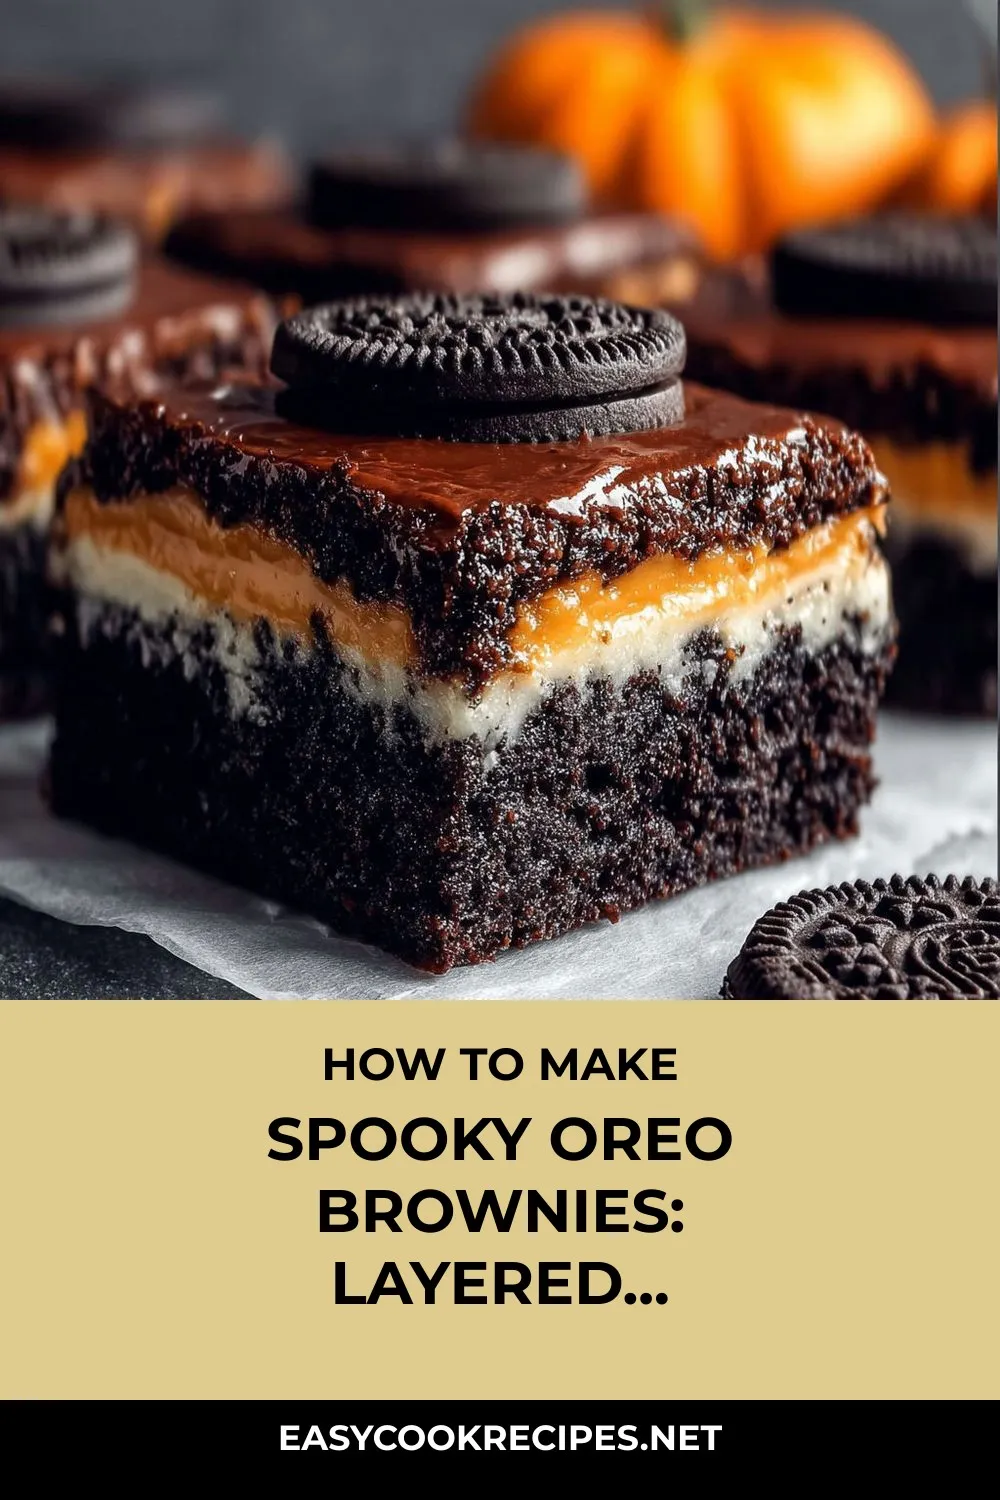
Welcome to a spooktacular treat that will have everyone howling with delight – Oreo Layered Halloween Brownies! These decadent brownies are a frightfully fun twist on the classic dessert, featuring a ghoulish surprise of crunchy Halloween Oreos hidden inside. With vibrant swirls of orange and purple, these brownies are not only a feast for the taste buds but also a feast for the eyes.
Baking these Oreo Layered Halloween Brownies is a joyous experience that brings families together in the spirit of Halloween. Whether you’re a seasoned baker or a novice in the kitchen, the simplicity of this recipe allows for creativity and personalization. The best part? The ooey-gooey goodness of the orange-filled Oreos nestled within each slice, adding a delightful crunch to every bite.
Elevate your Halloween party spread with these hauntingly delicious brownies that are guaranteed to be a graveyard smash. From the playful decorations to the rich, fudgy layers, these brownies are a wickedly delightful treat that will leave your guests spellbound. So gather your little goblins and get ready to create a bewitching batch of Oreo Layered Halloween Brownies that will cast a spell on everyone who tastes them!
Quick Benefits
- Easy to bake and decorate, suitable for all levels of expertise
- Can be stored for up to a week in the fridge or frozen for later use
- Versatile recipe with options for ingredient substitutions for various dietary needs
- Playful and festive Halloween treat that can be customized for other holidays as well
Why You’ll Love This Spooky Oreo Brownies: Layered Halloween Treats Recipe
- Festive and Fun: Perfect for Halloween parties, these brownies are visually appealing with purple and orange swirls, Halloween Oreos, and Halloween-themed sprinkles, making them a hit with both kids and adults.
- Easy to Make: The recipe is beginner-friendly, with simple instructions and ingredients that are easily accessible at any grocery store. Decorating them is a fun activity for the whole family, making it a great Halloween tradition.
- Versatile: You can customize the recipe by swapping ingredients – use different types of Oreos or sandwich cookies, adjust the sweetness level by choosing different types of chocolate, or make them gluten-free for those with allergies.
- Long-Lasting: These brownies can be stored for up to four days at room temperature, up to one week in the refrigerator, and they freeze well. The decorations hold up even after freezing, making them a convenient make-ahead dessert.
- Great for Any Occasion: Not just for Halloween, you can adapt this recipe for other holidays by changing the colors and decorations. Think red and green for Christmas, pastels for Easter, or heart-shaped for Valentine’s Day.
- Deliciously Indulgent: With a fudgy texture, a surprise crunch from the Oreo layer, and the option to add chocolate chips for extra richness, these brownies are a decadent treat that pairs perfectly with ice cream or a glass of milk.
- Creative Presentation: Serve these brownies on a festive Halloween tray with additional candy decorations for an edible centerpiece. You can even cut them into fun shapes using cookie cutters for different occasions.
Ingredients for Spooky Oreo Brownies: Layered Halloween Treats
Brownie Layer
- 1 cup all-purpose flour
- 1/2 teaspoon salt
- 1 cup unsalted butter, melted
- 4 large eggs
- 1 cup unsweetened Dutch-processed cocoa powder
- 1 cup packed brown sugar
- 1 cup semi-sweet chocolate chips (optional)
- 2 cups granulated sugar
- 1 tablespoon vanilla extract
- 1/2 teaspoon baking powder
Oreo Layer
- 20 to 24 Halloween Oreos or classic Oreos
Festive Topping
- Crushed Oreos for garnish (optional)
- Halloween-themed sprinkles
- 1 1/2 cups white chocolate or white candy melts
- Orange food coloring or orange candy melts
- Candy eyeballs (optional)
- Purple food coloring or purple candy melts
Pro Tips for Spooky Oreo Brownies: Layered Halloween Treats
For the perfect Oreo Layered Halloween Brownies, remember to use melted butter for a fudgy texture, but be sure not to overmix the batter to avoid a tough crumb. Adding chocolate chips will give your brownies a richer, denser flavor that everyone will love. Classic Oreos work just as well if the Halloween versions aren’t available, so feel free to use what you have on hand to create a delicious treat.
After baking, allow the brownies to cool fully in the pan, then use the parchment paper overhang to easily lift them out for clean cuts. To add a festive touch, melt white chocolate or candy melts, divide for coloring with orange and purple hues, and drizzle over the brownies before decorating with sprinkles and candy eyeballs. Store your decorated brownies in an airtight container for up to three days to keep them moist and fresh for your Halloween gathering. Enjoy customizing these spooky treats with playful decorations and layering for a fun and delicious dessert that will delight your guests!
How to Make Spooky Oreo Brownies: Layered Halloween Treats
Step 1: Prepare Pan
Preheat the oven to 350°F. Line a 9 by 13-inch baking dish with parchment paper, allowing it to overhang. Lightly grease the parchment with butter or nonstick spray.
Step 2: Mix Brownie Batter
Combine melted butter, granulated sugar, and brown sugar in a large bowl. Whisk until smooth and glossy. Add eggs one at a time, mixing well after each addition. Stir in vanilla extract.
Step 3: Combine Dry Ingredients
In a separate bowl, sift together cocoa powder, all-purpose flour, baking powder, and salt. Gradually add the dry ingredients to the wet mixture, stirring until just combined. Fold in chocolate chips if desired, being careful not to overmix.
Step 4: Layer Brownie and Oreos
Evenly spread half of the brownie batter in the prepared pan. Place Oreos in a single layer on top, then spread the remaining batter over the Oreos and smooth with a spatula.
Step 5: Bake
Bake for 35 to 40 minutes, or until a toothpick inserted in the center comes out with a few moist crumbs. Cool brownies completely on a wire rack after removing from the oven.
Step 6: Decorate
Melt white chocolate or candy melts in a microwave-safe bowl in 30-second intervals, stirring until smooth. Divide into bowls, tint with orange and purple coloring, then drizzle over cooled brownies. Add Halloween sprinkles and candy eyeballs while chocolate is wet. Let topping set for 20-30 minutes.
Step 7: Slice and Serve
Gently lift the brownies out of the pan using the parchment overhang. Cut into 16 squares with a sharp knife, wiping the blade clean after each cut. Place on a platter for serving.
📌 Pin for later!
Storage Tips
Once your Oreo Layered Halloween Brownies are baked and decorated, it’s essential to store them properly to keep them fresh. For short-term storage, place the brownies in an airtight container at room temperature for up to four days. If you need them to last longer, refrigerate the brownies for up to one week. Additionally, these brownies freeze well. To freeze, wrap individual slices in plastic wrap followed by foil and thaw them at room temperature before serving. The sprinkles and drizzle on top of the brownies hold up well even after freezing, maintaining their festive appearance.
If you are unable to find Halloween Oreos, you can easily substitute them with classic Oreos for a delicious alternative. When it comes to coloring the white chocolate or candy melts for decorating, remember to melt the chocolate first, divide it for coloring, and then drizzle it over the brownies before adding sprinkles and candy eyeballs. By following these storage tips and decoration techniques, you can enjoy these spooky and delicious brownies for several days while maintaining their festive appearance and flavors.
Ingredient Substitutions
If you don’t have Halloween Oreos, feel free to use classic Oreos in this recipe for the same delicious flavor. The brownies will still look festive with the orange and purple swirls, making them perfect for any Halloween gathering. Additionally, you can experiment with other sandwich cookies for a unique twist on this recipe, allowing you to personalize the brownies to your taste preferences.
If you can’t find white candy melts, white chocolate chips are a great substitute for the drizzle on top of the brownies. Just be sure to melt the white chocolate slowly to prevent seizing. For a less sweet version, consider using bittersweet chocolate chips in the batter. If you need to make these brownies gluten-free, a gluten-free flour blend can be used as a substitute for all-purpose flour, accommodating those with allergies without compromising on taste and texture.
Serving Suggestions
For a fun and festive serving suggestion, create a Halloween brownie bar where guests can customize their Oreo Layered Halloween Brownies with a variety of toppings. Set out bowls of Halloween-themed sprinkles, candy eyeballs, crushed Oreos, and additional colorful candy melts for drizzling. Let everyone get creative with their own unique brownie masterpiece!
To elevate your Halloween party spread, serve these Oreo Layered Halloween Brownies alongside a spooky dessert charcuterie board. Include a mix of orange and purple candies, festive cookies, and other Halloween treats to complement the brownies. Arrange everything on a large serving platter or board, and watch as your guests delight in the delicious and visually appealing spread.
FAQs for Spooky Oreo Brownies: Layered Halloween Treats
Can I use classic Oreos instead of Halloween Oreos?
Yes, classic Oreos work well if Halloween versions aren’t available. The flavor remains delicious.
How should I store the brownies to keep them fresh?
Absolutely. Store them in an airtight container for up to three days to keep them moist and fresh.
Any tips for decorating the brownies with colored chocolate and sprinkles?
Melt white chocolate or candy melts, divide for coloring, and drizzle before adding sprinkles and candy eyeballs.
What can I use if I can’t find white candy melts for the recipe?
White chocolate bars or chips work well. Tint with gel food coloring for the desired festive hues.
Conclusion
I hope you enjoy baking and sharing these Oreo Layered Halloween Brownies with your loved ones as much as I do with mine. It’s amazing how a simple dessert can bring so much joy and laughter to special occasions. The combination of rich brownie layers, surprise Oreo filling, and vibrant Halloween colors makes these treats perfectly festive and delicious.
Remember, baking is all about having fun and creating memories. So don’t stress over perfect decorations or precise cuts – embrace the imperfections and enjoy the process. Whether you’re hosting a Halloween party, treating your family, or simply indulging in a sweet moment for yourself, these Oreo Layered Halloween Brownies are sure to delight and satisfy. Happy baking, and may your kitchen be filled with spooky sweet aromas and laughter!
📌 Pin for later!
Spooky Oreo Brownies: Layered Halloween Treats
Sink your fangs into fudgy Oreo Layered Halloween Brownies, a spooky twist on a classic treat with orange-filled Oreos and vibrant purple and orange swirls.
Prep Time20 min
Cook Time40 min
Total Time60 min
CuisineAmerican
Skill LevelEasy
Servings16 Servings (16 brownies)
Ingredients
Brownie Layer
- 1 cup all-purpose flour
- 1/2 teaspoon salt
- 1 cup unsalted butter, melted
- 4 large eggs
- 1 cup unsweetened Dutch-processed cocoa powder
- 1 cup packed brown sugar
- 1 cup semi-sweet chocolate chips (optional)
- 2 cups granulated sugar
- 1 tablespoon vanilla extract
- 1/2 teaspoon baking powder
Oreo Layer
- 20 to 24 Halloween Oreos or classic Oreos
Festive Topping
- Crushed Oreos for garnish (optional)
- Halloween-themed sprinkles
- 1 1/2 cups white chocolate or white candy melts
- Orange food coloring or orange candy melts
- Candy eyeballs (optional)
- Purple food coloring or purple candy melts
Instructions
-
Prepare Pan: Preheat the oven to 350°F. Line a 9 by 13-inch baking dish with parchment paper, allowing it to overhang. Lightly grease the parchment with butter or nonstick spray.
-
Mix Brownie Batter: Combine melted butter, granulated sugar, and brown sugar in a large bowl. Whisk until smooth and glossy. Add eggs one at a time, mixing well after each addition. Stir in vanilla extract.
-
Combine Dry Ingredients: In a separate bowl, sift together cocoa powder, all-purpose flour, baking powder, and salt. Gradually add the dry ingredients to the wet mixture, stirring until just combined. Fold in chocolate chips if desired, being careful not to overmix.
-
Layer Brownie and Oreos: Evenly spread half of the brownie batter in the prepared pan. Place Oreos in a single layer on top, then spread the remaining batter over the Oreos and smooth with a spatula.
-
Bake: Bake for 35 to 40 minutes, or until a toothpick inserted in the center comes out with a few moist crumbs. Cool brownies completely on a wire rack after removing from the oven.
-
Decorate: Melt white chocolate or candy melts in a microwave-safe bowl in 30-second intervals, stirring until smooth. Divide into bowls, tint with orange and purple coloring, then drizzle over cooled brownies. Add Halloween sprinkles and candy eyeballs while chocolate is wet. Let topping set for 20-30 minutes.
-
Slice and Serve: Gently lift the brownies out of the pan using the parchment overhang. Cut into 16 squares with a sharp knife, wiping the blade clean after each cut. Place on a platter for serving.