Follow Me On Social Media!

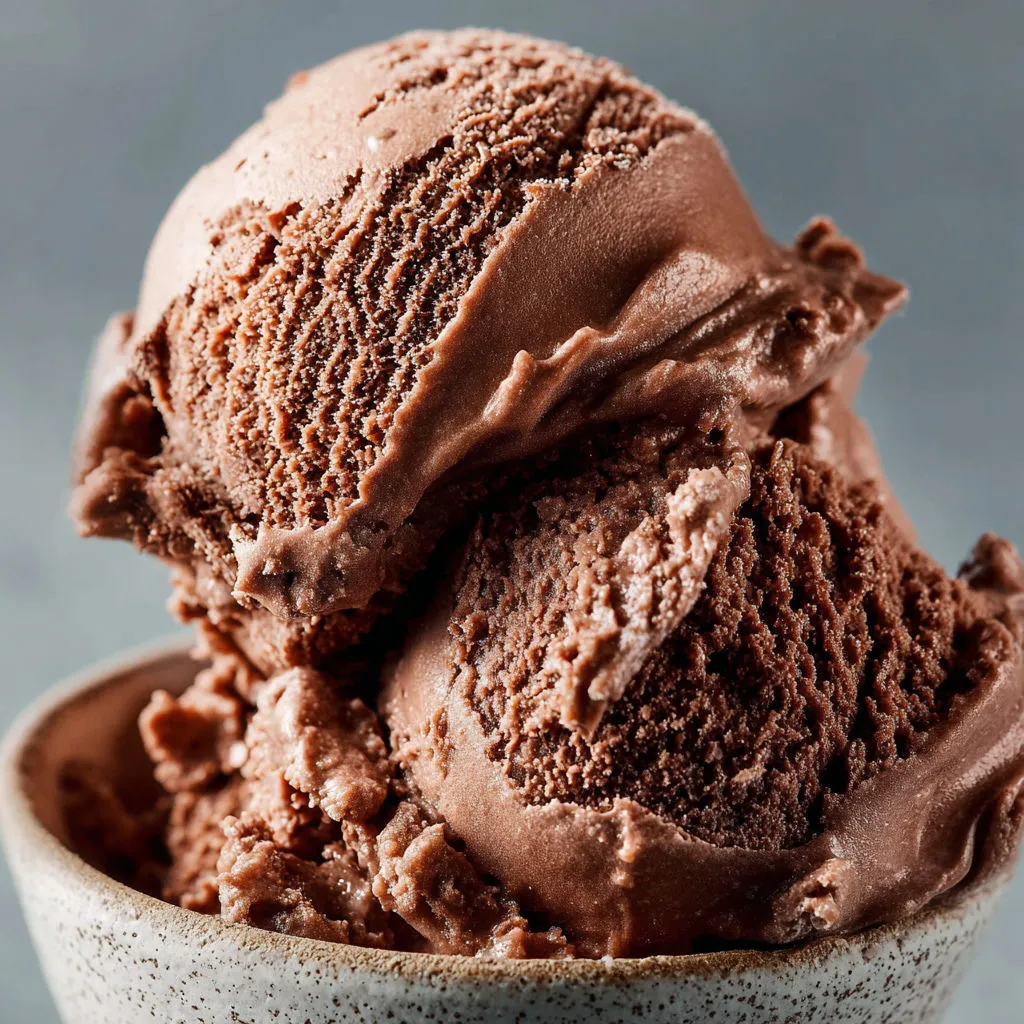
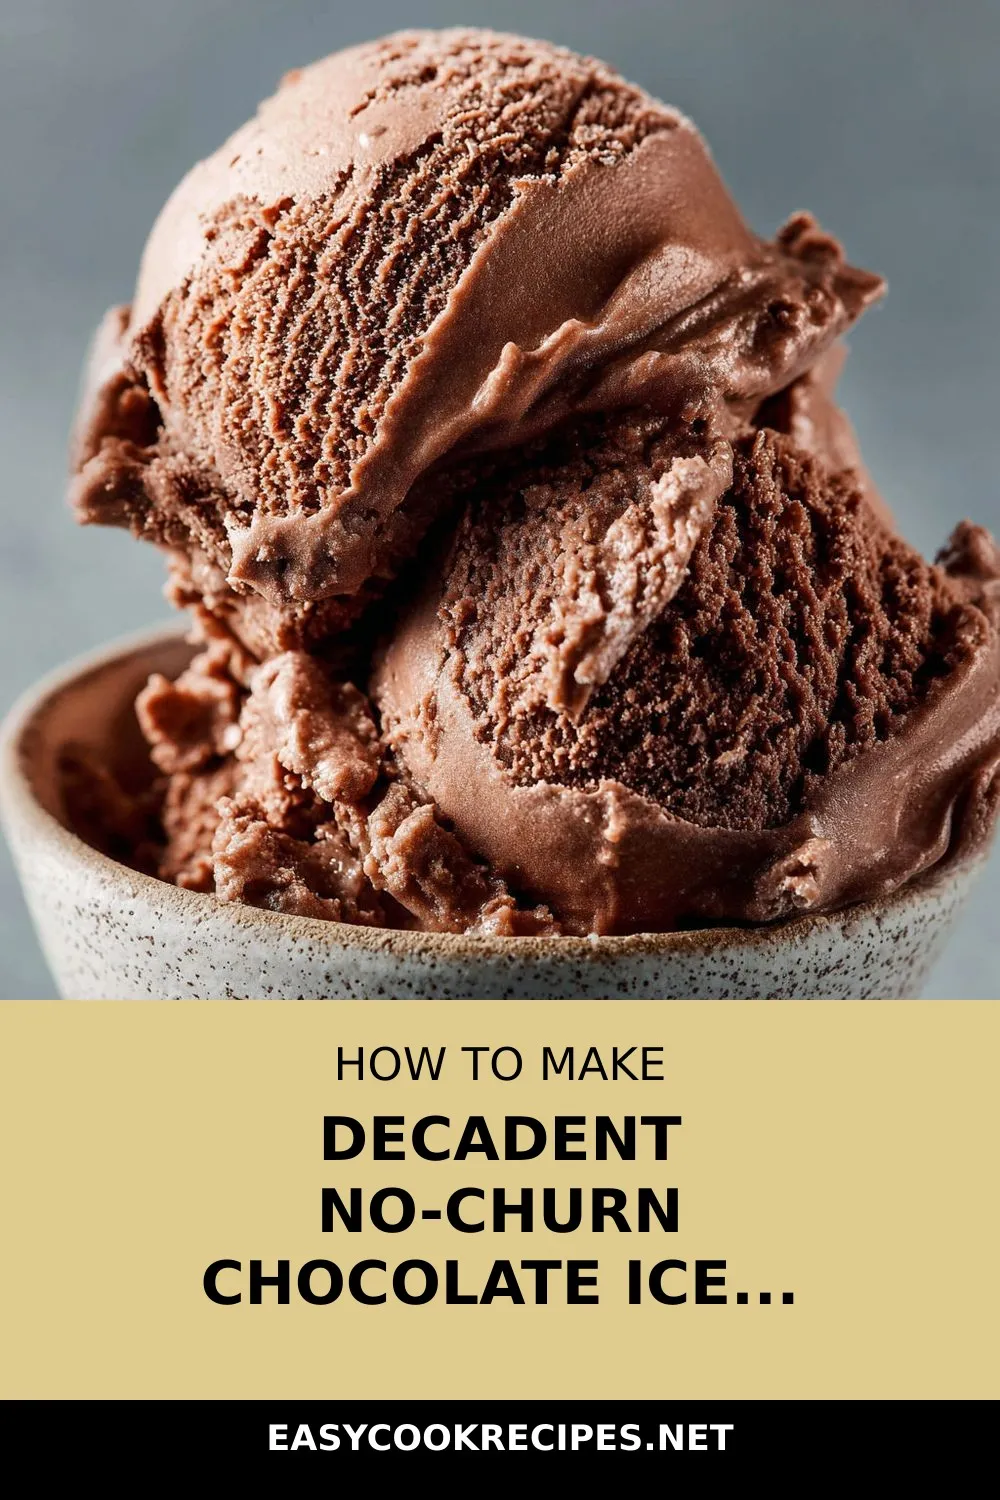
Indulge in the velvety goodness of homemade No-Churn Chocolate Ice Cream—a decadent treat that’s surprisingly easy to whip up without any fancy equipment. This recipe is a game-changer for chocolate lovers, offering a rich and creamy delight with every spoonful. Perfect for hot summer days or any occasion where a cool, chocolaty dessert is in order.
Crafted with simple ingredients like heavy whipping cream, sweetened condensed milk, and unsweetened cocoa powder, this No-Churn Chocolate Ice Cream is a crowd-pleaser that will have your friends and family coming back for seconds. The secret lies in the perfect balance of ingredients and a simple folding technique that creates a luscious texture without the need for an ice cream machine.
Whether you choose to swirl in fudge, peanut butter, or caramel sauce, this homemade chocolate ice cream is a true showstopper that will have everyone asking for your secret recipe. Take a scoop on its own, sandwich it between cookies, or create a lavish ice cream sundae—the possibilities are endless. Once you try this No-Churn Chocolate Ice Cream, you may never look at store-bought ice cream the same way again.
Quick Benefits
- Easy to make without special equipment – no churn or ice cream maker needed
- Rich and creamy texture with whipped cream folding technique
- Versatile – customize with various mix-ins like chocolate chips, cookies, nuts, and swirls
- Can be adapted for dietary preferences with dairy-free and lactose-free substitutions
Why You’ll Love This Decadent No-Churn Chocolate Ice Cream Recipe Recipe
- Rich and Creamy: This no-churn chocolate ice cream is incredibly rich and creamy, making it a decadent treat for any chocolate lover.
- No Special Equipment Needed: You don’t need an ice cream maker to whip up this delicious dessert, making it accessible to everyone.
- Easy to Make: With simple folding techniques and basic ingredients, this recipe is easy to follow and perfect for beginners.
- Customizable: You can personalize this ice cream by adding your favorite mix-ins like chocolate chips, crushed cookies, nuts, or swirls of fudge, peanut butter, or caramel sauce.
- Versatile Serving Options: Enjoy this chocolate ice cream in a cone, sandwiched between cookies, over brownies, or as part of an indulgent sundae—so many ways to enjoy it!
- Family Favorite: With rave reviews from friends and family, this ice cream is sure to be a hit at parties and gatherings.
- Longer Shelf Life: Store this ice cream in a well-sealed container for up to two weeks, allowing you to enjoy it over time without losing its flavor.
- Creative Twists: Experiment with different flavors like raspberry jam, peppermint extract, or toasted pecans to create unique variations of this classic chocolate ice cream.
Ingredients for Decadent No-Churn Chocolate Ice Cream Recipe
Base
- 1/2 cup unsweetened cocoa powder
- 1 teaspoon pure vanilla extract
- 1/2 teaspoon salt
- 1 can (14 oz) sweetened condensed milk
- 2 cups heavy whipping cream, chilled
For Extra Chocolate Depth
- 4 oz semi-sweet or dark chocolate, melted and cooled
Optional Add-ins
- Swirl of fudge, peanut butter, or caramel sauce
- 1/4 cup chopped nuts (almonds, pecans, or walnuts)
- 1/4 cup crushed cookies (Oreos, graham crackers, or biscoff)
- 1/2 cup chocolate chips or chunks
Pro Tips for Decadent No-Churn Chocolate Ice Cream Recipe
To make this no-churn chocolate ice cream truly decadent, use high-quality ingredients for the best flavor. Opt for a good brand of cocoa powder and dark chocolate to deepen the richness of the ice cream. Don’t skip the step of melting chocolate and letting it cool before adding it to the mixture—it really enhances the overall taste.
When incorporating mix-ins like chocolate chips, crushed cookies, and nuts, be sure to fold them gently into the base to evenly distribute them without deflating the whipped cream. Experiment with different combinations of mix-ins to create your own unique flavor profile. For a neater presentation, layer the mix-ins in the container as you fill it with the ice cream base for a beautiful marbled effect when scooped.
Remember to freeze the ice cream for at least 6 hours to achieve the perfect texture. To prevent ice crystals from forming, press a piece of parchment paper onto the surface before sealing the container. Serve within the first week for the best taste and texture, and feel free to get creative with variations like adding a swirl of raspberry jam or toasted pecans for different seasonal flavors.
How to Make Decadent No-Churn Chocolate Ice Cream Recipe
Step 1: Whip the Cream
In a large mixing bowl, whip chilled heavy whipping cream with a hand mixer or stand mixer on medium-high speed until stiff peaks form, about 3 to 5 minutes. Be careful not to overwhip to prevent graininess or butter formation.
Step 2: Prepare the Chocolate Base
Combine sweetened condensed milk, unsweetened cocoa powder, vanilla extract, and salt in a bowl. Whisk until smooth, ensuring cocoa is fully dissolved. Stir in melted and cooled chocolate until well mixed.
Step 3: Fold Cream into Chocolate Mixture
Fold whipped cream into chocolate mixture in batches using a spatula, gently incorporating with a light motion until smooth and fluffy.
Step 4: Incorporate Optional Add-ins
Gently mix in chocolate chips, cookie crumbs, or chopped nuts. Swirl fudge, peanut butter, or caramel sauce as desired using a knife or spoon.
Step 5: Freeze
Pour the mixture into a loaf pan or freezer-safe container, smooth the top, cover tightly, and freeze for at least 6 hours or overnight until firm.
Step 6: Serve
Allow ice cream to sit at room temperature for 5 minutes before serving in bowls, cones, or as a dessert.
📌 Pin for later!
Storage Tips
To store the finished no-churn chocolate ice cream, it is essential to place it in a well-sealed freezer container to prevent freezer burn. A classic option is to use a loaf pan covered with plastic wrap, or you can opt for old gelato tubs for easier scooping. For added freshness, press a piece of parchment paper onto the surface before sealing the container. To maintain the best texture and flavor, it is recommended to consume the ice cream within ten to fourteen days, with the flavor being at its peak within the first week.
If you are looking to make a dairy-free version of this no-churn chocolate ice cream, you can replace the heavy cream with coconut cream. Additionally, choose a dairy-free condensed milk substitute if you need to avoid lactose. While natural cocoa powder can be used in a pinch for the chocolate base, Dutch-process cocoa powder will bring a bolder flavor profile. Experiment with different mix-ins and swirls for unique variations, such as adding raspberry jam for a summery twist, peppermint extract for a festive winter version, or toasted pecans for a cozy fall flavor.
Ingredient Substitutions
For a dairy-free version of this no-churn chocolate ice cream, you can replace the heavy cream with coconut cream. The texture may be slightly lighter, but it will still be delicious. Additionally, if you want to make this recipe lactose-free, you can use a dairy-free condensed milk substitute instead of the regular sweetened condensed milk.
If you don’t have semi-sweet or dark chocolate on hand, you can skip the melted chocolate and rely solely on the unsweetened cocoa powder for the chocolate flavor. This will result in a lighter chocolate taste but can still be delicious. You can also experiment with different types of chocolate chips, crushed cookies, or nuts to customize the mix-ins to your preference.
When it comes to the swirl of fudge, peanut butter, or caramel sauce, feel free to get creative with your choices. You can use store-bought sauces or make your own at home. Each sauce will add a unique flavor profile to the ice cream, so choose based on your personal taste preferences.
Serving Suggestions
Serve this decadent no-churn chocolate ice cream in a variety of creative ways to elevate your dessert game! Scoop it onto warm brownies for a rich and indulgent treat, or sandwich it between two chocolate cookies for a homemade ice cream sandwich. For a show-stopping dessert, create an epic ice cream sundae by layering the chocolate ice cream with salty peanuts and a generous drizzle of fudge sauce. You can also customize your ice cream with small chunks of toffee or berries for a special touch on celebratory occasions.
For a refreshing twist, swirl in some raspberry jam for a summery flavor, or add peppermint extract for a festive winter version. Toasted pecans mixed into the ice cream base bring a cozy fall flavor to your dessert. Don’t forget to double the batch and freeze in smaller containers for convenient single-serve treats, perfect for satisfying your sweet cravings at any time!
FAQs for Decadent No-Churn Chocolate Ice Cream Recipe
Can I substitute the heavy whipping cream with a lighter option like milk or half-and-half?
Heavy cream is essential for achieving the desired thickness and creaminess in this recipe. Using milk or half-and-half will not yield the same smooth texture.
Is it necessary to include the melted chocolate in the recipe, or can I skip it for a lighter flavor?
The melted chocolate adds depth to the flavor of the ice cream. If you prefer a lighter chocolate flavor, you can skip the melted chocolate and rely solely on the cocoa powder for classic chocolate notes.
How long should I freeze the ice cream for before it is ready to serve?
For a firm, scoopable texture, it’s recommended to freeze the ice cream for at least 6 hours or overnight. Before serving, let it stand at room temperature for a few minutes to make scooping easier.
Can I customize the mix-ins and swirls in this no-churn chocolate ice cream?
Absolutely! Feel free to customize the ice cream by adding your favorite mix-ins like chocolate chips, crushed cookies, nuts, or swirls of fudge, peanut butter, or caramel sauce. Get creative and make it your own!
Conclusion
No-Churn Chocolate Ice Cream is truly a magical treat that brings joy to any occasion. Whether you’re making it for a special celebration or just a cozy night in, the rich and creamy flavors of this homemade ice cream are sure to impress your friends and family. The best part? You don’t need any special equipment to whip up this decadent dessert.
Experiment with different mix-ins and swirls to create your own signature version of No-Churn Chocolate Ice Cream. From toasted nuts to fruity jams, the possibilities are endless. This recipe is all about celebrating creativity in the kitchen, and I encourage you to have fun and make it your own.
So go ahead, give this No-Churn Chocolate Ice Cream recipe a try, and treat yourself to a scoop of homemade goodness. Once you experience the luscious texture and intense chocolate flavor, you may never want to go back to store-bought ice cream again. Enjoy the process of creating this delightful dessert, and savor every spoonful of your creamy masterpiece!
📌 Pin for later!
Decadent No-Churn Chocolate Ice Cream Recipe
Indulge in rich and creamy no-churn chocolate ice cream, a decadent treat made without any special equipment.
Prep Time20 min
Cook Time~ undefined
Total Time20 min
CuisineAmerican
Skill LevelEasy
Servings8 Servings (1 standard loaf pan (about 1.5 quarts))
Ingredients
Base
- 1/2 cup unsweetened cocoa powder
- 1 teaspoon pure vanilla extract
- 1/2 teaspoon salt
- 1 can (14 oz) sweetened condensed milk
- 2 cups heavy whipping cream, chilled
For Extra Chocolate Depth
- 4 oz semi-sweet or dark chocolate, melted and cooled
Optional Add-ins
- Swirl of fudge, peanut butter, or caramel sauce
- 1/4 cup chopped nuts (almonds, pecans, or walnuts)
- 1/4 cup crushed cookies (Oreos, graham crackers, or biscoff)
- 1/2 cup chocolate chips or chunks
Instructions
-
Whip the Cream: In a large mixing bowl, whip chilled heavy whipping cream with a hand mixer or stand mixer on medium-high speed until stiff peaks form, about 3 to 5 minutes. Be careful not to overwhip to prevent graininess or butter formation.
-
Prepare the Chocolate Base: Combine sweetened condensed milk, unsweetened cocoa powder, vanilla extract, and salt in a bowl. Whisk until smooth, ensuring cocoa is fully dissolved. Stir in melted and cooled chocolate until well mixed.
-
Fold Cream into Chocolate Mixture: Fold whipped cream into chocolate mixture in batches using a spatula, gently incorporating with a light motion until smooth and fluffy.
-
Incorporate Optional Add-ins: Gently mix in chocolate chips, cookie crumbs, or chopped nuts. Swirl fudge, peanut butter, or caramel sauce as desired using a knife or spoon.
-
Freeze: Pour the mixture into a loaf pan or freezer-safe container, smooth the top, cover tightly, and freeze for at least 6 hours or overnight until firm.
-
Serve: Allow ice cream to sit at room temperature for 5 minutes before serving in bowls, cones, or as a dessert.