Follow Me On Social Media!

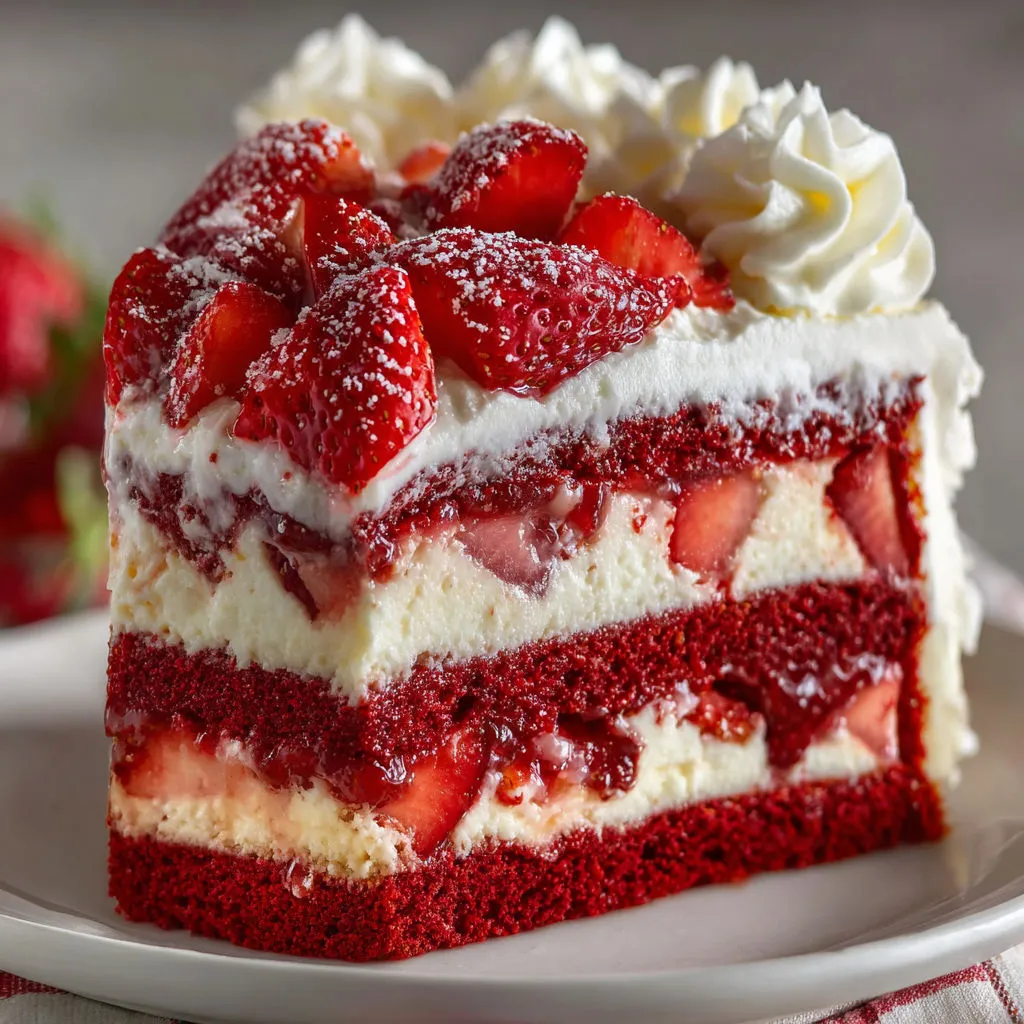
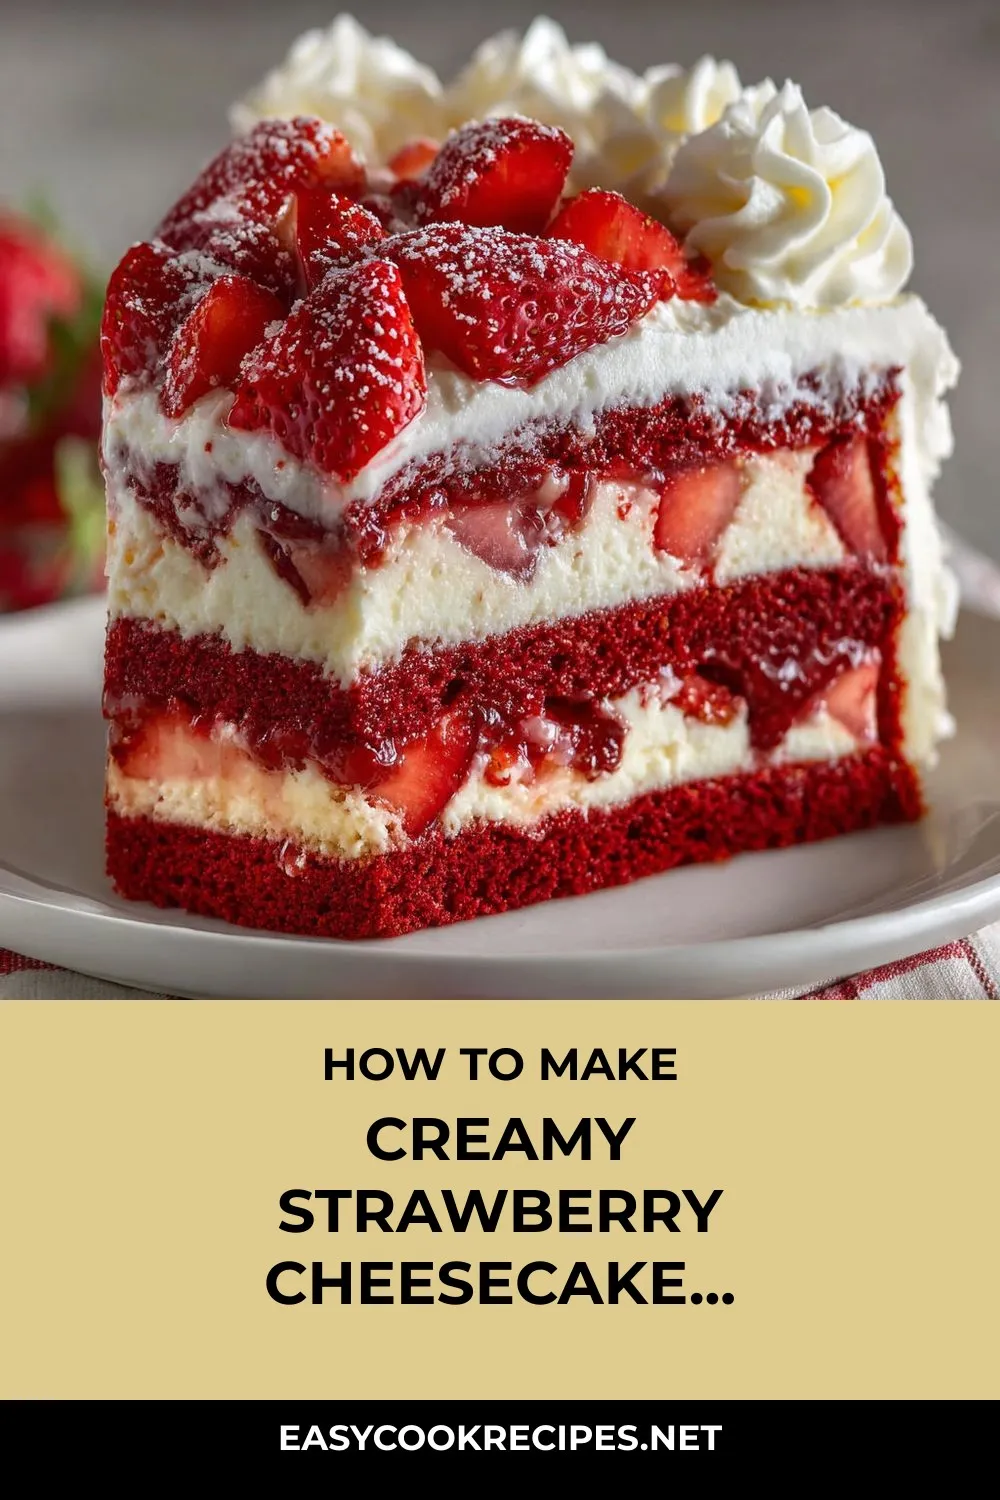
Indulge in the ultimate dessert experience with this luscious creation – the Strawberries Cream Dream Cheesecake. A harmonious blend of red velvet cake, creamy cheesecake, and vibrant strawberries, this showstopper is sure to steal the spotlight at any gathering. Each heavenly bite delivers a symphony of flavors that will have your taste buds singing with delight.
Crafted with layers of love and attention to detail, this dessert is more than just a cake – it’s a celebration in every slice. The addition of strawberry compote adds a delightful tang that perfectly complements the sweetness of the cake and cheesecake layers. Whether you’re hosting a spring brunch, a birthday bash, or simply craving something extraordinary, this cheesecake is here to elevate your dessert game to new heights.
So, gather your ingredients, unleash your inner baker, and get ready to create a masterpiece that will leave your guests clamoring for more. With its exquisite flavors and stunning presentation, the Strawberries Cream Dream Cheesecake is not just a dessert – it’s a work of art that will make every occasion truly unforgettable.
Quick Benefits
- Whipping the cream separately and gently folding it into the cream cheese creates a mousse-like, airy cheesecake filling.
- Macerating softens the berries and brings out their natural juices, making for even, flavorful layers without excess moisture.
- Assembling the cake a day in advance allows the flavors and textures to blend beautifully for easier serving.
- Chilling the assembled dessert thoroughly before slicing and using a sharp, warm knife results in clean, attractive slices.
Why You’ll Love This Creamy Strawberry Cheesecake Recipe Recipe
- Showstopper Dessert: This cake is a stunning masterpiece that combines layers of red velvet cake, creamy cheesecake, and fresh strawberries for a show-stopping dessert that will impress any guest.
- Perfect for Spring Celebrations: With its fresh strawberry flavors and vibrant colors, this cake is perfect for spring celebrations, birthdays, brunches, or even Mother’s Day.
- Memorable Taste and Texture: Each slice delivers a delightful combination of fresh berries, creamy filling, and tender cake, creating a memorable taste and texture experience that will keep you coming back for more.
- Versatile and Customizable: You can easily customize this recipe by swapping in different cake flavors, adding different types of berries, or changing up the flavor profile with additions like orange zest. The possibilities are endless!
- Crowd-Pleaser: The contrast between the creamy layers and the bright, tangy berries makes this cake a real crowd-pleaser. Your guests will be fighting for the corner pieces!
- Make-Ahead Option: This cake can be assembled ahead of time and frozen for convenience. Just remember to allow enough time for thawing in the refrigerator before serving to ensure the best flavors and textures.
- Special Occasion Centerpiece: Whether it’s a birthday, a bridal shower, or a neighborhood barbecue, this cake is a beautiful centerpiece that will elevate any special occasion and create lasting memories.
- Easy to Store and Serve: Leftovers can be stored in the refrigerator for up to three days, or sliced and frozen for longer storage. Thaw frozen slices in the fridge overnight for best texture.
Ingredients for Creamy Strawberry Cheesecake Recipe
Cake Layers
- 1 teaspoon vanilla extract (optional)
- Ingredients called for on the cake mix box (typically eggs, oil, and water in amounts specified by manufacturer)
- 1 box red velvet cake mix
No-Bake Cheesecake Filling
- 2 cups heavy whipping cream, cold
- 1 cup granulated sugar
- 1 tablespoon lemon juice
- 24 ounces cream cheese, softened (3 standard 8-ounce bricks)
- 1 teaspoon vanilla extract
Fresh Strawberry Layer
- 2 cups fresh strawberries, hulled and sliced
- 2 tablespoons granulated sugar
Strawberry Compote or Glaze Layer
- 2 cups fresh strawberries, diced
- 1 tablespoon cornstarch
- 1/3 cup granulated sugar
- 1 tablespoon lemon juice
- 2 tablespoons water
Topping and Decoration
- Whipped cream for piping (optional, homemade or stabilized)
- Cream cheese frosting for decoration (optional)
- Fresh sliced strawberries
Pro Tips for Creamy Strawberry Cheesecake Recipe
For a homemade touch, consider baking a red velvet cake from scratch rather than using a boxed mix. Just ensure your layers are completely cooled before assembling to maintain stability.
To create a light and airy cheesecake filling, whip your heavy cream separately before gently folding it into the cream cheese mixture. This technique will result in a mousse-like texture that complements the other layers perfectly.
When preparing the strawberries for the compote, macerating them with sugar and lemon juice will soften the berries and enhance their natural juices, ensuring even, flavorful layers without excess moisture. Chill the assembled dessert thoroughly before slicing for clean, attractive cuts, using a sharp, warm knife for the best results.
How to Make Creamy Strawberry Cheesecake Recipe
Step 1: Prepare Cake Batter
Prepare the red velvet cake batter according to the box instructions, adding optional vanilla extract for flavor. Preheat oven as directed, and grease and line cake pans with parchment paper.
Step 2: Bake and Cool Cake Layers
Pour the batter evenly into the cake pans. Bake as directed or until a toothpick comes out clean. Let the cakes cool in the pans for 10 minutes before transferring to a cooling rack. Use a serrated knife to level the cake tops for even layers.
Step 3: Macerate Strawberries
In a bowl, mix sliced strawberries with 2 tablespoons of sugar, toss gently to coat. Allow to sit for 10-15 minutes to develop juices.
Step 4: Make Strawberry Compote
Combine diced strawberries, sugar, and lemon juice in a saucepan. Cook over medium heat, stirring occasionally, until berries release their juices and soften. Simmer for 5 to 7 minutes, then stir in a mixture of cornstarch and water. Cook until thickened, then cool.
Step 5: Prepare Cheesecake Filling
In a mixing bowl, beat softened cream cheese until smooth. Add sugar, lemon juice, and vanilla extract, mix well. In a separate bowl, whip cold heavy cream to stiff peaks. Gently fold whipped cream into cream cheese mixture until smooth. Refrigerate until ready to use.
Step 6: Set Up Assembly Station
Prepare the cake layers, cheesecake filling, macerated strawberries, compote, and decorations. Place the first cake layer on a serving plate or in a springform pan for accurate assembly.
Step 7: Assemble Base Cake Layer
Place the first cake layer on the serving plate and gently brush off any crumbs.
Step 8: Spread Cheesecake Filling
Spread a generous layer of cheesecake filling, about 1/3 to 1/2 inch thick, on top of the base cake layer.
Step 9: Add Macerated Strawberries
Evenly spread the macerated strawberries on top of the cheesecake layer to ensure balanced flavor and texture.
Step 10: Spread Strawberry Compote
Spread a thin layer of strawberry compote evenly over the strawberries.
Step 11: Add Second Cheesecake Layer
Spread a second layer of cheesecake filling over the compote, using an offset spatula to smooth it out.
Step 12: Top With Second Cake Layer
Gently place the second cake layer on top, pressing lightly to secure the layers while avoiding squeezing out the filling.
Step 13: Frost and Decorate
Top with a final layer of cheesecake filling. Place fresh sliced strawberries and additional compote on top. Pipe whipped cream around the edges and decorate with cream cheese frosting.
Step 14: Chill Cake
Chill in the refrigerator for a minimum of 4 hours or overnight for optimal texture and easy slicing.
📌 Pin for later!
Storage Tips
After creating the delectable Strawberries and Cream Dream Layer Cheesecake Cake, store any leftovers covered in the refrigerator to maintain freshness for up to three days. If you wish to preserve the cake longer, cut slices and wrap them securely before freezing. For the best texture upon thawing, it is recommended to allow frozen slices to defrost overnight in the refrigerator.
To elevate the flavors and presentation of the cake, consider making variations such as using white or vanilla cake mix as a base for a lighter appearance, or incorporating a touch of orange zest into the cheesecake for added brightness. In the event that fresh strawberries are not in season, frozen berries can be utilized for the compote layer after thawing and draining them to remove excess moisture. Additionally, swapping in fresh raspberries or a berry blend during peak strawberry season can bring a new twist to the dessert.
For those planning ahead, the unassembled components of the cake can be frozen individually and assembled later. Whether freezing the entire finished dessert or sliced portions, ensure ample time for thawing in the refrigerator before serving to allow the flavors and textures to reach their optimal state. Remember to savor each step of creating, chilling, and slicing this exquisite cake to fully appreciate its beauty and flavors.
Ingredient Substitutions
For a homemade touch, consider baking a white or vanilla cake from scratch if you prefer a different flavor profile. Just ensure the cake layers are fully cooled before assembling the cheesecake.
If fresh strawberries are not in season, you can use frozen berries for the compote layer after thawing and draining them to remove excess moisture. Consider adding a hint of orange zest to the cheesecake filling for a citrusy twist, altering the flavor profile slightly.
To enhance the presentation, try decorating the cake with fresh raspberries or a mix of berries when strawberries are at their peak. Edible flowers can also be used for a festive touch, perfect for special occasions like bridal or baby showers. In colder months, consider drizzling melted white chocolate over the cake for a wintery aesthetic.
Serving Suggestions
For a creative serving suggestion, consider layering individual mini versions of the Strawberries and Cream Dream Layer Cheesecake Cake in elegant glass jars for a stunning presentation at a garden party or bridal shower. Simply alternate red velvet cake cubes, no-bake cheesecake filling, and strawberry compote in each jar, topping with fresh berries and a dollop of whipped cream for a delightful single-serve dessert that’s as beautiful as it is delicious.
Another fun idea is to deconstruct the cake into a build-your-own dessert bar at your next gathering. Set up stations with sliced red velvet cake, bowls of creamy cheesecake filling, strawberry compote, fresh berries, whipped cream, and additional toppings like chocolate shavings or crushed nuts. Let guests create their own layered masterpiece, allowing for personalized combinations and a fun interactive experience that will surely delight everyone’s taste buds.
FAQs for Creamy Strawberry Cheesecake Recipe
Can I use homemade red velvet cake instead of the boxed mix?
Yes, you can substitute homemade red velvet cake for the boxed mix. Just ensure the layers are fully cooled before assembling for stable stacking.
Why should I whip the cream separately and fold it into the cream cheese for the filling?
Whipping the cream separately and gently folding it into the cream cheese creates a mousse-like, airy cheesecake filling.
What does macerating the strawberries do for the cake?
Macerating softens the berries and brings out their natural juices, making for even, flavorful layers without excess moisture.
Is it necessary to chill the assembled dessert before slicing?
Chill the assembled dessert thoroughly before slicing and use a sharp, warm knife for clean, attractive slices.
Conclusion
As you embark on creating your very own “Strawberries Cream Dream Cheesecake,” remember that every step is a labor of love that will culminate in a dessert that is as stunning as it is delicious. This recipe is truly a showstopper, and I hope it becomes a cherished tradition in your household, just like it has in mine.
Whether you’re celebrating a special occasion or simply craving a taste of summer, this cake is sure to bring joy to those who savor it. So, take your time, enjoy the process, and revel in the delightful layers of flavor that the “Strawberries Cream Dream Cheesecake” has to offer. Your efforts will undoubtedly be rewarded with smiles, compliments, and perhaps even requests for the recipe. Happy baking!
📌 Pin for later!
Creamy Strawberry Cheesecake Recipe
Indulge in layers of red velvet cake, no-bake cheesecake, and fresh strawberries in this showstopping Strawberries Cream Dream Cheesecake.
Prep Time45 min
Cook Time30 min
Total Time75 min
CuisineAmerican
Skill LevelEasy
Servings12 Servings (one 8-inch double layer cake)
Ingredients
Cake Layers
- 1 teaspoon vanilla extract (optional)
- Ingredients called for on the cake mix box (typically eggs, oil, and water in amounts specified by manufacturer)
- 1 box red velvet cake mix
No-Bake Cheesecake Filling
- 2 cups heavy whipping cream, cold
- 1 cup granulated sugar
- 1 tablespoon lemon juice
- 24 ounces cream cheese, softened (3 standard 8-ounce bricks)
- 1 teaspoon vanilla extract
Fresh Strawberry Layer
- 2 cups fresh strawberries, hulled and sliced
- 2 tablespoons granulated sugar
Strawberry Compote or Glaze Layer
- 2 cups fresh strawberries, diced
- 1 tablespoon cornstarch
- 1/3 cup granulated sugar
- 1 tablespoon lemon juice
- 2 tablespoons water
Topping and Decoration
- Whipped cream for piping (optional, homemade or stabilized)
- Cream cheese frosting for decoration (optional)
- Fresh sliced strawberries
Instructions
-
Prepare Cake Batter: Prepare the red velvet cake batter according to the box instructions, adding optional vanilla extract for flavor. Preheat oven as directed, and grease and line cake pans with parchment paper.
-
Bake and Cool Cake Layers: Pour the batter evenly into the cake pans. Bake as directed or until a toothpick comes out clean. Let the cakes cool in the pans for 10 minutes before transferring to a cooling rack. Use a serrated knife to level the cake tops for even layers.
-
Macerate Strawberries: In a bowl, mix sliced strawberries with 2 tablespoons of sugar, toss gently to coat. Allow to sit for 10-15 minutes to develop juices.
-
Make Strawberry Compote: Combine diced strawberries, sugar, and lemon juice in a saucepan. Cook over medium heat, stirring occasionally, until berries release their juices and soften. Simmer for 5 to 7 minutes, then stir in a mixture of cornstarch and water. Cook until thickened, then cool.
-
Prepare Cheesecake Filling: In a mixing bowl, beat softened cream cheese until smooth. Add sugar, lemon juice, and vanilla extract, mix well. In a separate bowl, whip cold heavy cream to stiff peaks. Gently fold whipped cream into cream cheese mixture until smooth. Refrigerate until ready to use.
-
Set Up Assembly Station: Prepare the cake layers, cheesecake filling, macerated strawberries, compote, and decorations. Place the first cake layer on a serving plate or in a springform pan for accurate assembly.
-
Assemble Base Cake Layer: Place the first cake layer on the serving plate and gently brush off any crumbs.
-
Spread Cheesecake Filling: Spread a generous layer of cheesecake filling, about 1/3 to 1/2 inch thick, on top of the base cake layer.
-
Add Macerated Strawberries: Evenly spread the macerated strawberries on top of the cheesecake layer to ensure balanced flavor and texture.
-
Spread Strawberry Compote: Spread a thin layer of strawberry compote evenly over the strawberries.
-
Add Second Cheesecake Layer: Spread a second layer of cheesecake filling over the compote, using an offset spatula to smooth it out.
-
Top With Second Cake Layer: Gently place the second cake layer on top, pressing lightly to secure the layers while avoiding squeezing out the filling.
-
Frost and Decorate: Top with a final layer of cheesecake filling. Place fresh sliced strawberries and additional compote on top. Pipe whipped cream around the edges and decorate with cream cheese frosting.
-
Chill Cake: Chill in the refrigerator for a minimum of 4 hours or overnight for optimal texture and easy slicing.