Follow Me On Social Media!

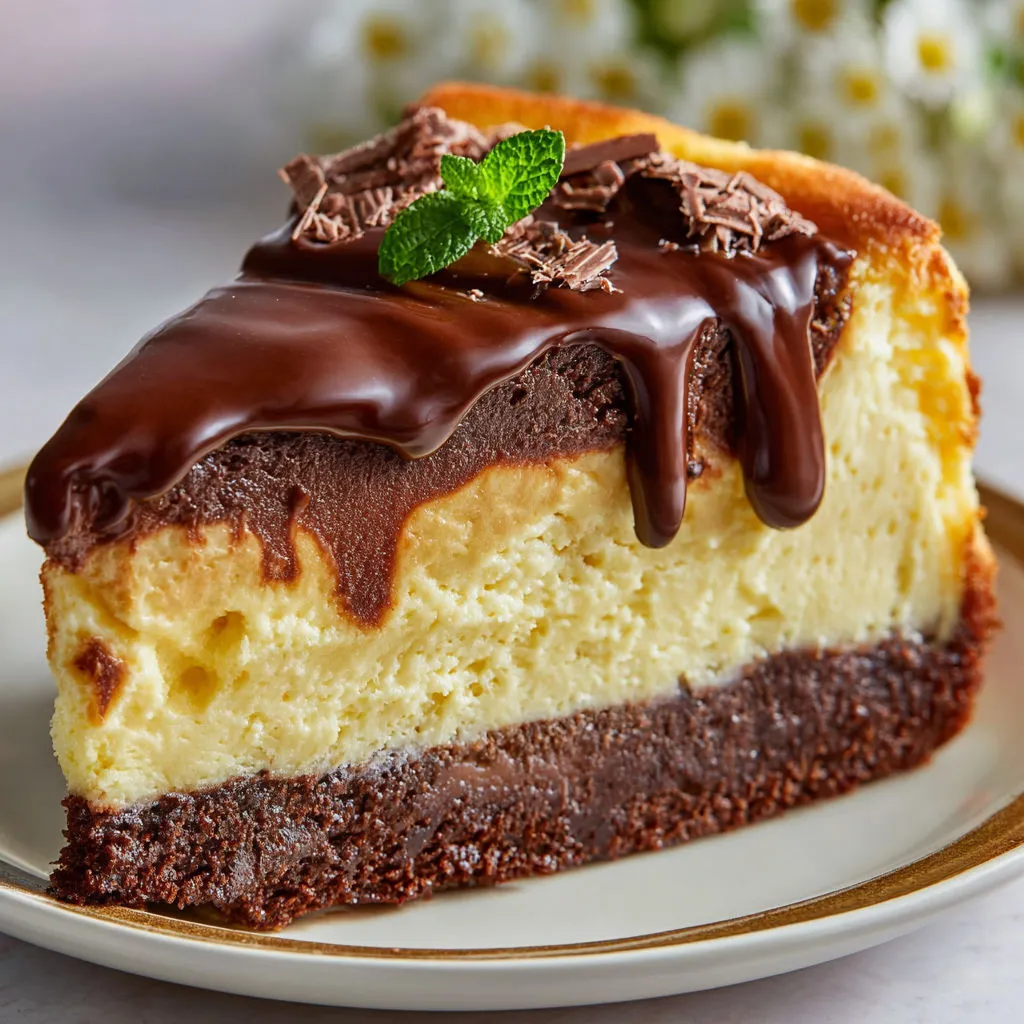
Welcome to the indulgent world of Boston Cream Pie Cheesecake – a luxurious fusion of classic Boston Cream Pie and creamy cheesecake goodness that will leave your taste buds dancing. This show-stopping dessert is a true crowd-pleaser, perfect for any special occasion or simply when you’re craving a slice of something extraordinary.
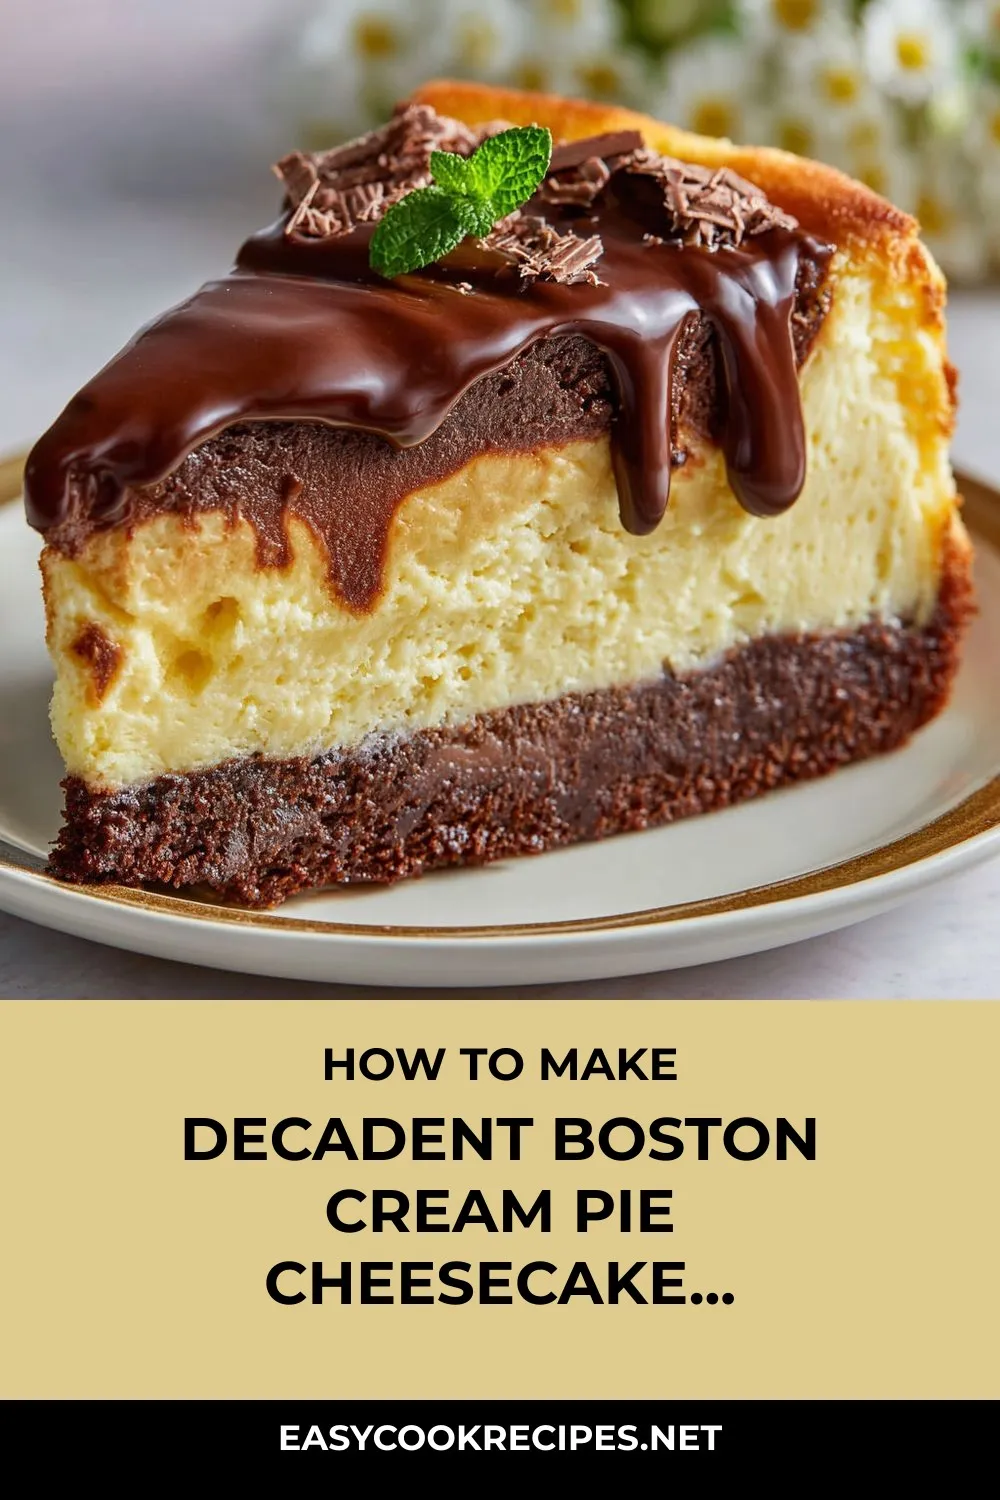
Imagine a velvety layer of rich custard nestled between a smooth, creamy cheesecake filling, all topped with a glossy chocolate finish that’s as decadent as it is delightful. This dessert is a feast for the eyes and the palate, sure to make every gathering a memorable one. Boston Cream Pie Cheesecake has quickly become a family favorite in my home, with requests for seconds always echoing around the table.
Whether you’re a seasoned baker or a dessert enthusiast looking to impress, this recipe is a must-try. So, gather your ingredients, preheat your oven, and get ready to embark on a baking adventure that will culminate in a slice of pure bliss. Let’s dive into the delicious world of Boston Cream Pie Cheesecake and create memories that will last a lifetime.
Quick Benefits
- Combines the beloved flavors of classic Boston Cream Pie and creamy luxury of cheesecake
- Can be made dairy-free by using plant-based cream cheese and non-dairy milk
- Freezes well for up to two months, making it a convenient make-ahead dessert
- Versatile – can be customized with different crusts, toppings, and flavor variations
Why You’ll Love This Decadent Boston Cream Pie Cheesecake Recipe Recipe
- This recipe combines the classic flavors of Boston Cream Pie and the creamy luxury of cheesecake, making it a showstopper dessert that will impress your guests.
- The rich custard, smooth cheesecake, and glossy chocolate finish create a harmonious blend of textures and flavors that will leave you craving more.
- The recipe offers versatility with ingredient substitutions, allowing you to customize it based on your dietary preferences or ingredient availability.
- The cheesecake can be made ahead of time and freezes well, making it a convenient option for special occasions or meal prep.
- Finishing touches like whipped cream, fresh berries, or citrus zest add a burst of flavor and a decorative touch to the dessert.
- The recipe provides helpful tips for achieving the perfect cheesecake texture and appearance, ensuring a professional-looking result every time.
- With variations like using different glazes or adding citrus zest, you can adapt the recipe to suit different seasons or occasions, making it a versatile dessert option.
- Whether served as a birthday cake or as the centerpiece of a holiday table, this Boston Cream Pie Cheesecake is guaranteed to delight and impress your guests with its nostalgic flavors and modern twist.
Ingredients for Decadent Boston Cream Pie Cheesecake Recipe
Graham Cracker Crust
- 2 cups graham cracker crumbs
- Pinch of salt
- 1/2 cup melted unsalted butter
- 1/4 cup granulated sugar
Vanilla Wafer or Cookie Crust (Alternative)
- 1/2 teaspoon vanilla extract (optional)
- 2 tablespoons granulated sugar
- 1/2 cup melted unsalted butter
- 2 cups crushed vanilla wafers or butter cookies
Cheesecake Layer
- 2 teaspoons vanilla extract
- 3 large eggs, room temperature
- 24 ounces cream cheese, room temperature
- 1 cup granulated sugar
- 1/4 teaspoon salt
- 1 tablespoon cornstarch
- 1 cup sour cream
Pastry Cream (Custard Layer)
- Pinch of salt
- 4 large egg yolks
- 2 teaspoons vanilla extract
- 2 cups whole milk
- 1/4 cup cornstarch
- 2 tablespoons unsalted butter
- 1/2 cup granulated sugar
Ganache Topping
- 1 tablespoon butter (optional, for added shine)
- 1/2 cup heavy cream
- 1 cup semi-sweet chocolate chips or chopped chocolate
Pro Tips for Decadent Boston Cream Pie Cheesecake Recipe
When making the Boston Cream Pie Cheesecake, use either graham cracker or vanilla wafer crumbs mixed with melted butter for a delicious and stable crust. Ensure your cream cheese is at room temperature and mix until fluffy, adding eggs one at a time to prevent lumps in your cheesecake batter. Remember to bake your cheesecake in a water bath for even cooking and cool it gradually with the oven door cracked to prevent cracking. Chill thoroughly before assembling to ensure clean slicing and well-set layers.
For the custard, cook gently and chill before spreading to achieve a smooth texture. When preparing the ganache, slightly cool it before spreading over the chilled pastry cream for a glossy finish. Remember to refrigerate the cheesecake for several hours or overnight to allow the layers to fully set, resulting in a perfectly creamy and delicious Boston Cream Pie Cheesecake that will impress your guests.
How to Make Decadent Boston Cream Pie Cheesecake Recipe
Step 1: Prepare Springform Pan and Oven
Preheat oven to 325°F and line the bottom of a 9-inch springform pan with parchment paper.
Step 2: Combine Crust Ingredients
Combine graham cracker crumbs (or vanilla wafer crumbs), sugar, and salt in a bowl. Stir in melted butter until mixture resembles damp sand.
Step 3: Form and Bake Crust
Evenly press crumb mixture into the bottom of the springform pan using your hands or a flat-bottomed cup. Bake for 8 to 10 minutes until lightly set. Let it cool before preparing the filling.
Step 4: Prepare Cheesecake Batter
Beat cream cheese until smooth and fluffy. Mix in sugar until creamy. Stir in sour cream, salt, and vanilla until combined. Add cornstarch and mix. Add eggs one at a time at low speed, blending until just combined.
Step 5: Assemble and Bake Cheesecake
Pour the cheesecake batter over the cooled crust and smooth the top. To create a water bath, wrap the outside of the pan in aluminum foil and place it in a larger tray. Fill the outer tray with hot water until it reaches halfway up the sides of the pan. Bake at 325°F on the center rack for 50–60 minutes, or until the edges are set and the center slightly jiggles.
Step 6: Cool Cheesecake Gradually
After baking, turn off the oven and allow the cake to rest inside with the door slightly open for 1 hour. Then, let the cake cool at room temperature for an additional hour before refrigerating for 4–6 hours, or overnight, until fully chilled.
Step 7: Prepare Pastry Cream
Warm milk in a saucepan without boiling. Whisk egg yolks, sugar, cornstarch, and salt in a bowl until smooth. Slowly whisk warm milk into egg mixture. Cook mixture in saucepan over medium heat, whisking constantly until thickened (about 3-5 minutes). Remove from heat, stir in butter and vanilla. Transfer to a bowl, cover with plastic wrap directly on the surface of the custard, and refrigerate for 1 hour until cold.
Step 8: Layer Custard Over Cheesecake
Evenly spread chilled pastry cream over the cold cheesecake. Use a spatula to create a smooth layer. Refrigerate before making the ganache.
Step 9: Prepare Ganache Topping
Heat heavy cream until steaming but not boiling. Pour over chocolate chips and let sit for 1 minute. Stir until smooth and glossy. Optionally, mix in butter for extra shine. Cool ganache for 5–10 minutes before using.
Step 10: Finish With Ganache and Chill
Drizzle ganache over pastry cream and tilt cheesecake to spread evenly. Chill for 30–45 minutes to set.
Step 11: Slice and Serve
Use a thin knife to loosen the edges of the cake before removing the pan sides. Cut with a hot, clean knife for clean slices, and serve cold.
📌 Pin for later!
Storage Tips
To store the finished Boston Cream Pie Cheesecake, it is best to refrigerate any leftovers tightly wrapped. The cheesecake will stay fresh and creamy for up to five days, and the glossy chocolate topping will remain intact if kept cool. If you prefer to freeze the cheesecake, you can slice it and wrap the individual slices with layers of plastic and foil, or freeze the whole cheesecake for up to two months. Thaw the frozen cheesecake overnight in the refrigerator before serving to enjoy it at its best.
For alternative variations, you can use simple butter cookies if you are out of vanilla wafers for the crust. Additionally, you can substitute half of the chocolate in the ganache with dark chocolate for a richer taste. If you prefer a tangier twist, you can replace half of the sour cream with Greek yogurt. For a dairy-free option, you can use plant-based cream cheese, non-dairy milk, and cream, though the texture may vary slightly from the original but will still be delicious. Finish each slice with whipped cream, fresh berries, or a sprinkle of lemon zest for added brightness and flavor. Serve the cheesecake chilled with hot coffee or strong black tea for a delightful contrast.
Ingredient Substitutions
For potential ingredient substitutions in this Boston Cream Pie Cheesecake recipe, you can swap vanilla wafers with butter cookies for the crust, which will still provide a buttery and delicious base. If you prefer a richer ganache, consider using dark chocolate for half of the chocolate amount in the recipe. This will give a deeper flavor profile to the chocolate topping. Additionally, if you want to add a tangy twist, replace half of the sour cream with Greek yogurt. This substitution will bring a tangier element to the cheesecake without compromising the overall texture.
For those looking to make a dairy-free version of this Boston Cream Pie Cheesecake, you can use plant-based cream cheese and non-dairy milk and cream as substitutes. While the texture may vary slightly, these replacements will still yield a delicious dessert. To enhance the flavors, consider finishing each slice with a dollop of whipped cream, fresh berries, or a sprinkle of lemon zest. These additions will brighten up the dish and provide a lovely contrast to the rich flavors of the cheesecake.
Serving Suggestions
To elevate the presentation of your Boston Cream Pie Cheesecake, consider serving each slice with a drizzle of warm salted caramel sauce for a sweet and savory contrast. Garnish with a sprinkle of crushed toffee bits for added texture and crunch, creating a decadent dessert experience that will leave your guests craving more. Another delightful option is to place a scoop of creamy vanilla bean ice cream on top of each slice, allowing it to slightly melt and mingle with the rich layers of custard and chocolate. The cold and creamy ice cream will provide a delightful contrast to the silky cheesecake, creating a harmonious blend of flavors and textures that will impress any dessert lover.
FAQs for Decadent Boston Cream Pie Cheesecake Recipe
Can I use dark chocolate instead of semi-sweet chocolate for the ganache?
Yes, you can substitute half the chocolate for dark chocolate in the ganache for a richer taste.
Can I make this cheesecake dairy-free?
Yes, you can use a plant-based cream cheese and non-dairy milk and cream to make this cheesecake dairy-free. The texture may be slightly different, but it will still be delicious.
How should I store leftovers of the Boston Cream Pie Cheesecake?
Refrigerate leftovers tightly wrapped for up to five days. The cheesecake freezes well; slice it and wrap with layers of plastic and foil or freeze whole for up to two months. Thaw overnight in the refrigerator before serving.
What are some variations I can try with this Boston Cream Pie Cheesecake?
You can use strawberry or raspberry glaze instead of chocolate for a spring version. Adding orange zest in the custard and ganache can work beautifully in winter. For parties or potlucks, you can make mini cheesecakes in muffin tins.
Conclusion
As you embark on making your own Boston Cream Pie Cheesecake, remember that each step is a labor of love that will culminate in a dessert worth celebrating. The layers of creamy custard, velvety cheesecake, and decadent chocolate ganache come together to create a harmonious symphony of flavors and textures that will surely impress your guests.
So whether you’re planning a special occasion or simply craving a sweet treat, don’t hesitate to try your hand at making this indulgent Boston Cream Pie Cheesecake. With a bit of patience and a whole lot of passion, you’ll be rewarded with a dessert that is as beautiful as it is delicious. Let this recipe be your guide to creating a showstopping masterpiece that will have everyone asking for seconds. Enjoy every moment of the baking process and savor every bite of the final result. Boston Cream Pie Cheesecake is a dessert that is sure to bring joy and delight to all who taste it.
📌 Pin for later!
Decadent Boston Cream Pie Cheesecake Recipe
Indulge in the decadent fusion of a classic Boston Cream Pie and luscious cheesecake with creamy custard and glossy chocolate in every velvety bite.
Prep Time45 min
Cook Time60 min
Total Time105 min
CuisineAmerican
Skill LevelEasy
Servings12 Servings (1 whole cheesecake)
Ingredients
Graham Cracker Crust
- 2 cups graham cracker crumbs
- Pinch of salt
- 1/2 cup melted unsalted butter
- 1/4 cup granulated sugar
Vanilla Wafer or Cookie Crust (Alternative)
- 1/2 teaspoon vanilla extract (optional)
- 2 tablespoons granulated sugar
- 1/2 cup melted unsalted butter
- 2 cups crushed vanilla wafers or butter cookies
Cheesecake Layer
- 2 teaspoons vanilla extract
- 3 large eggs, room temperature
- 24 ounces cream cheese, room temperature
- 1 cup granulated sugar
- 1/4 teaspoon salt
- 1 tablespoon cornstarch
- 1 cup sour cream
Pastry Cream (Custard Layer)
- Pinch of salt
- 4 large egg yolks
- 2 teaspoons vanilla extract
- 2 cups whole milk
- 1/4 cup cornstarch
- 2 tablespoons unsalted butter
- 1/2 cup granulated sugar
Ganache Topping
- 1 tablespoon butter (optional, for added shine)
- 1/2 cup heavy cream
- 1 cup semi-sweet chocolate chips or chopped chocolate
Instructions
-
Prepare Springform Pan and Oven: Preheat oven to 325°F and line the bottom of a 9-inch springform pan with parchment paper.
-
Combine Crust Ingredients: Combine graham cracker crumbs (or vanilla wafer crumbs), sugar, and salt in a bowl. Stir in melted butter until mixture resembles damp sand.
-
Form and Bake Crust: Evenly press crumb mixture into the bottom of the springform pan using your hands or a flat-bottomed cup. Bake for 8 to 10 minutes until lightly set. Let it cool before preparing the filling.
-
Prepare Cheesecake Batter: Beat cream cheese until smooth and fluffy. Mix in sugar until creamy. Stir in sour cream, salt, and vanilla until combined. Add cornstarch and mix. Add eggs one at a time at low speed, blending until just combined.
-
Assemble and Bake Cheesecake: Pour the cheesecake batter over the cooled crust and smooth the top. To create a water bath, wrap the outside of the pan in aluminum foil and place it in a larger tray. Fill the outer tray with hot water until it reaches halfway up the sides of the pan. Bake at 325°F on the center rack for 50–60 minutes, or until the edges are set and the center slightly jiggles.
-
Cool Cheesecake Gradually: After baking, turn off the oven and allow the cake to rest inside with the door slightly open for 1 hour. Then, let the cake cool at room temperature for an additional hour before refrigerating for 4–6 hours, or overnight, until fully chilled.
-
Prepare Pastry Cream: Warm milk in a saucepan without boiling. Whisk egg yolks, sugar, cornstarch, and salt in a bowl until smooth. Slowly whisk warm milk into egg mixture. Cook mixture in saucepan over medium heat, whisking constantly until thickened (about 3-5 minutes). Remove from heat, stir in butter and vanilla. Transfer to a bowl, cover with plastic wrap directly on the surface of the custard, and refrigerate for 1 hour until cold.
-
Layer Custard Over Cheesecake: Evenly spread chilled pastry cream over the cold cheesecake. Use a spatula to create a smooth layer. Refrigerate before making the ganache.
-
Prepare Ganache Topping: Heat heavy cream until steaming but not boiling. Pour over chocolate chips and let sit for 1 minute. Stir until smooth and glossy. Optionally, mix in butter for extra shine. Cool ganache for 5–10 minutes before using.
-
Finish With Ganache and Chill: Drizzle ganache over pastry cream and tilt cheesecake to spread evenly. Chill for 30–45 minutes to set.
-
Slice and Serve: Use a thin knife to loosen the edges of the cake before removing the pan sides. Cut with a hot, clean knife for clean slices, and serve cold.