Follow Me On Social Media!

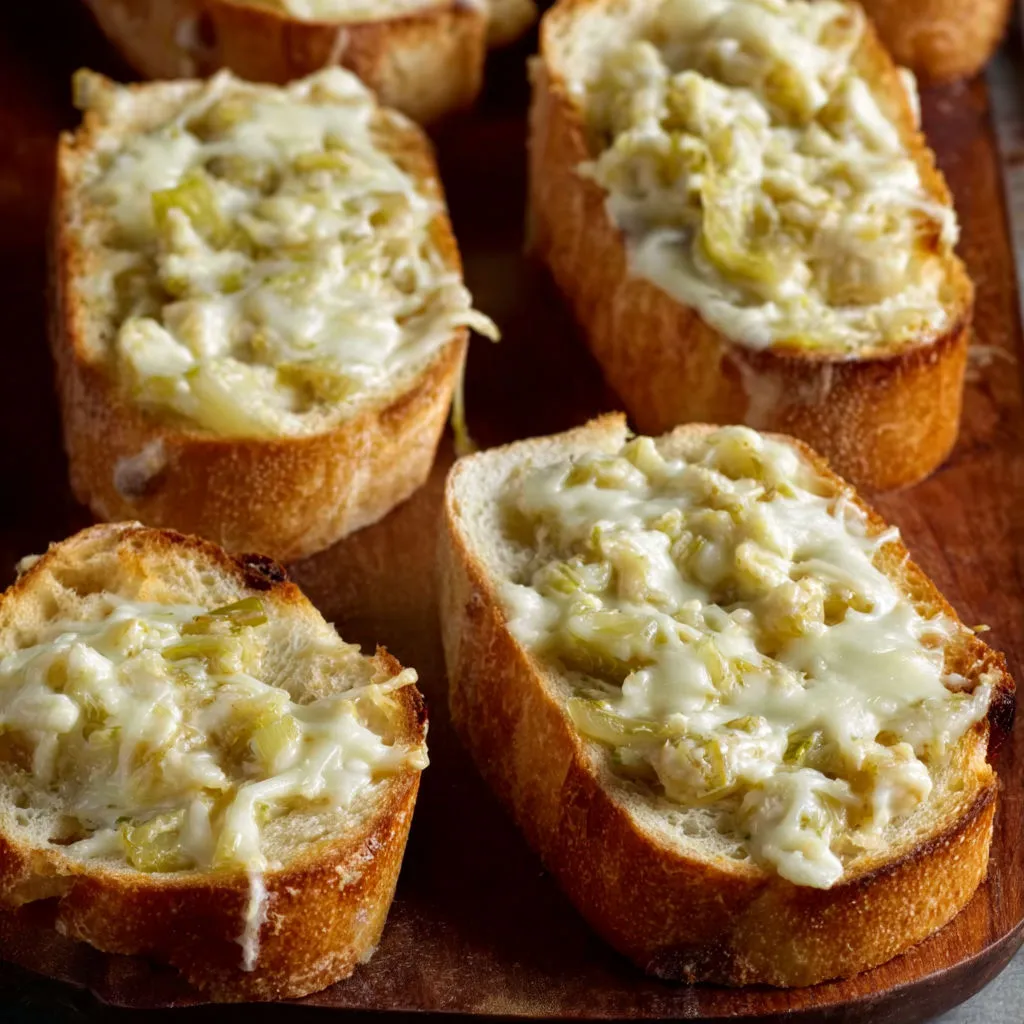
Indulge in the irresistible goodness of Josephinas Cheesy Garlic Bread – a true crowd-pleaser that never fails to impress! With its rich buttery cheese, zesty garlic, and mild green chiles, each bite of Josephinas is like a party in your mouth. This appetizer, with its perfect crunch and burst of flavors, is guaranteed to be the star of any gathering.
I first discovered Josephinas at a book club meeting, and ever since, they have been a staple at all my gatherings. The aroma of creamy cheese mingled with chiles takes me back to festive times with loved ones, making every bite a nostalgic delight. Whether served hot alongside cocktails or as a flavorful side to soups and salads, Josephinas Cheesy Garlic Bread is a timeless classic that promises to vanish from your table faster than you can imagine.
Quick Benefits
- Cheesy and flavorful appetizer that pleases a crowd and disappears quickly at gatherings
- Can be made ahead of time and leftovers keep well in the fridge for up to three days
- Versatile recipe with options for different cheeses, bread types, and add-ins for a personalized twist
- Provides a rich, buttery, and nostalgic taste that brings comfort and warmth to any occasion.
Why You’ll Love This Irresistible Cheesy Garlic Bread Recipe Recipe
- Irresistible Appetizer: This recipe offers a rich, buttery, and cheesy flavor with a pop of mild green chiles that make it simply irresistible for any gathering or party.
- Crowd-Pleaser: Perfect for pleasing a crowd, this Cheesy Garlic Bread will have everyone reaching for seconds and asking for the recipe.
- Nostalgic Comfort: The flavors in this dish evoke feelings of comfort and nostalgia, making it a favorite at family gatherings and holiday events.
- Versatile: Easily adaptable with variations like different types of cheese, herbs, or additional ingredients, allowing for personalization based on taste preferences.
- Make-Ahead: The convenience of preparing the cheese mixture ahead and freezing the assembled bread slices for later baking makes this recipe ideal for busy hosts.
- Freezer-Friendly: With the option to freeze the assembled bread slices for future use, you can enjoy this delicious appetizer at a moment’s notice.
- Quick and Easy: Ready to serve in just a few minutes under the broiler, making it a great option for last-minute gatherings or appetizer needs.
- Pairing Perfection: Whether served with cocktails, as part of a holiday snack platter, or alongside soups or salads, this Cheesy Garlic Bread complements a variety of dishes for a complete meal or appetizer spread.
Ingredients for Irresistible Cheesy Garlic Bread Recipe
Dairy and Spreads
- ½ cup mayonnaise
- 2 sticks unsalted butter, softened
- 8 ounces Monterey Jack cheese, shredded
Vegetables and Aromatics
- 2 cloves garlic, minced
- 2 cans (4 ounces each) mild diced green chiles, drained
Seasonings and Bread
- 1 French baguette
- 1 teaspoon kosher salt
Pro Tips for Irresistible Cheesy Garlic Bread Recipe
Pro Tip 1: For an extra kick of flavor, try using sharp white cheddar or pepper jack cheese instead of Monterey Jack. These cheeses will add more depth and bite to your Josephinas.
Pro Tip 2: To save time, you can prepare the cheesy garlic mixture a day in advance and refrigerate it until you’re ready to assemble and broil the bread. This is a great way to get ahead if you’re hosting a party or gathering.
Pro Tip 3: Don’t have a French baguette on hand? No problem! You can easily swap it out for sourdough or ciabatta bread for a delicious variation. Additionally, feel free to experiment with different herbs like thyme or basil, or add in sun-dried tomatoes or roasted red peppers for a unique twist on this classic recipe.
How to Make Irresistible Cheesy Garlic Bread Recipe
Step 1: Combine Creamy Mixture
Soften butter in a large bowl at room temperature. Mix in Monterey Jack cheese, minced garlic, mayonnaise, diced green chiles, and salt until well combined.
Step 2: Chill for Flavor Development
Chill the cheese mixture in the refrigerator for at least 1 hour to blend flavors.
Step 3: Prepare Baguette Slices
Position an oven rack 3–4 inches below the broiler. Preheat the broiler. Line two baking sheets with aluminum foil. Cut the baguette into ½-inch thick slices and place them in a single layer on the sheets.
Step 4: Spread and Assemble
Let the cheese mixture soften at room temperature for a few minutes. Spread a tablespoon of the mixture onto each baguette slice, ensuring even coverage to the edges. Refrigerate until ready to broil.
Step 5: Broil Until Golden
Broil one baking sheet at a time, rotating it once halfway through, until the cheese is bubbling and the edges are crisp and browned in spots, approximately 4–10 minutes per batch.
Step 6: Serve Immediately
Take out of the oven and serve warm as a tasty appetizer or snack for parties.
📌 Pin for later!

Storage Tips
Once the Josephinas Cheesy Garlic Bread has been prepared, any leftovers can be stored in an airtight container in the fridge for up to three days. To maintain the best texture when reheating, it is recommended to use the broiler or a hot oven for a few minutes instead of the microwave. If making a larger batch and planning to freeze some, assemble the dish but do not broil before freezing. When ready to enjoy the frozen portion, simply place the frozen Josephinas on a baking sheet and broil until golden and bubbly, just slightly longer than if they were freshly prepared.
For optimal enjoyment, Josephinas are best served warm when the cheese is melted and bubbly. However, they can also be served at room temperature for parties or gatherings. To preserve the dish for future consumption, it is advisable to make the cheese and butter mixture ahead of time and refrigerate it for up to a day before assembling and broiling just before serving. Josephinas pair well with tomato soup or can be served alongside a fresh salad for a delightful snack or appetizer spread.
Ingredient Substitutions
If you’re looking to switch up the cheese in Josephina’s Cheesy Garlic Bread, mozzarella or cheddar can be used as alternatives to Monterey Jack. Mozzarella will provide a similar melt-in-your-mouth texture, while cheddar can add a sharper flavor profile to the dish.
In place of fresh garlic, a pinch of garlic powder can be a convenient substitute. However, for the best flavor, fresh garlic is always recommended as it adds a vibrant taste to the cheesy garlic bread.
If you don’t have a French baguette on hand, sourdough or ciabatta can be excellent alternatives for the base of this dish. Each bread option will bring its own unique texture and flavor to the final result.
Serving Suggestions
For a creative serving suggestion, try slicing the French baguette on a diagonal to create longer pieces of Josephinas Cheesy Garlic Bread for an elegant presentation. Arrange them on a platter with a variety of dipping sauces like marinara, ranch, or balsamic glaze to offer guests a customizable flavor experience.
To elevate your Josephinas, consider topping them with a sprinkle of crispy bacon bits or a drizzle of honey for a sweet and savory twist. Serve these cheesy delights as a standout appetizer at your next gathering, and watch them disappear before your eyes as guests savor every delicious bite.
FAQs for Irresistible Cheesy Garlic Bread Recipe
Can I prepare the cheese and butter mixture ahead of time?
Yes, you can make the cheese and butter mixture ahead and refrigerate it for up to a day. Simply assemble and broil just before serving.
What other cheese options can I use besides Monterey Jack?
While Monterey Jack provides a mild flavor, you can also use mozzarella or cheddar for a different twist in your Josephinas.
Can I freeze the assembled Josephinas before broiling?
Yes, you can freeze the assembled Josephinas before broiling. Lay them on a sheet in a single layer until solid, then transfer to a container or freezer bag. When ready to bake, simply place the frozen Josephinas on a baking sheet and broil until golden and bubbly.
How should I reheat leftover Josephinas?
For best texture, reheat any leftover Josephinas under the broiler or in a hot oven for a few minutes instead of microwaving. This will help retain their crunchiness and cheesy goodness.
Conclusion
The aroma of Josephinas Cheesy Garlic Bread baking in the oven is sure to make your mouth water and your guests eagerly anticipate the first bite. The combination of buttery cheese, zesty garlic, and mild green chiles creates a flavor explosion that is guaranteed to be a hit at any gathering. Whether you are hosting a party, enjoying a cozy night in, or looking for a delicious appetizer to share, Josephinas Cheesy Garlic Bread is the perfect choice.
So go ahead, whip up a batch of Josephinas Cheesy Garlic Bread and watch them disappear before your eyes. Share the recipe with friends and family, and create your own traditions around this irresistible dish. With its versatility and crowd-pleasing flavors, Josephinas Cheesy Garlic Bread is sure to become a favorite in your household. Enjoy every cheesy, garlic-infused bite and savor the joy it brings to your table.
📌 Pin for later!
Irresistible Cheesy Garlic Bread Recipe
“Josephina’s Cheesy Garlic Bread: A crowd-pleasing, buttery appetizer filled with creamy cheese, mild green chiles, and a perfect crunch that disappears fast!”
Prep Time15 min
Cook Time20 min
Total Time35 min
CuisineAmerican
Skill LevelEasy
Servings16 Servings (Approximately 32 slices)
Ingredients
Dairy and Spreads
- ½ cup mayonnaise
- 2 sticks unsalted butter, softened
- 8 ounces Monterey Jack cheese, shredded
Vegetables and Aromatics
- 2 cloves garlic, minced
- 2 cans (4 ounces each) mild diced green chiles, drained
Seasonings and Bread
- 1 French baguette
- 1 teaspoon kosher salt
Instructions
-
Combine Creamy Mixture: Soften butter in a large bowl at room temperature. Mix in Monterey Jack cheese, minced garlic, mayonnaise, diced green chiles, and salt until well combined.
-
Chill for Flavor Development: Chill the cheese mixture in the refrigerator for at least 1 hour to blend flavors.
-
Prepare Baguette Slices: Position an oven rack 3–4 inches below the broiler. Preheat the broiler. Line two baking sheets with aluminum foil. Cut the baguette into ½-inch thick slices and place them in a single layer on the sheets.
-
Spread and Assemble: Let the cheese mixture soften at room temperature for a few minutes. Spread a tablespoon of the mixture onto each baguette slice, ensuring even coverage to the edges. Refrigerate until ready to broil.
-
Broil Until Golden: Broil one baking sheet at a time, rotating it once halfway through, until the cheese is bubbling and the edges are crisp and browned in spots, approximately 4–10 minutes per batch.
-
Serve Immediately: Take out of the oven and serve warm as a tasty appetizer or snack for parties.